
Where are you on your New Year’s resolutions? They often include words such as “simplify,” “organize” and “streamline.” They can be timely reminders to rethink how you do things in both your personal and professional lives, so why not rethink the software you use in 3D Printing?
Preparing a CAD solid model or an STL file to print on a 3D printer requires using set-up software that is typically unique to each printer’s manufacturer. For Flashforge equipment, you use FlashPrint, for Makerbot systems you use MakerBot Print, for Formlabs printers you use PreForm, and so on.

For printers from industrial 3D printing company Stratasys, the go-to software is GrabCAD Print (along with GrabCAD Print Mobile), developed for setting up both fused deposition modeling (FDM) and PolyJet technologies in new and efficient ways. Often just called GrabCAD, this versatile software package lets you organize and control prints assigned to one of more than 30 printer models, so the steps you learn for one printer transfer directly over to working with other models.
If you’ve previously used Stratasys Catalyst (on Dimension and uPrint printers), you’ll find similarities with GrabCAD, as well as some enhanced functionality. If you’re accustomed to the fine details of Stratasys Insight, you’ll see that GrabCAD provides similar capabilities in a streamlined interface, plus powerful new features made possible only by the direct import of native CAD files. Additionally, you can access Insight within GrabCAD, combining the best of both traditional and next-generation possibilities.
Simple by Default, Powerful by Choice
GrabCAD lets users select simplified default settings throughout, with more sophisticated options available at every turn. Here are the general steps for print-file preparation, done on your desktop, laptop or mobile device:
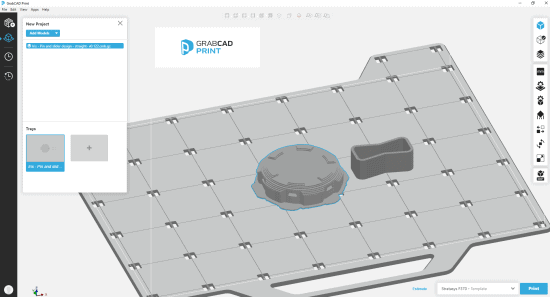
1 – Add Models: Click-and-drag files or open them from File Explorer. All standard CAD formats are supported, including SolidWorks, Autodesk, Siemens and PTC, as well as STL. You can also bring in assemblies of parts and multi-body models, choosing whether to print them assembled or not. (Later we’ll also talk about what you can do with a CAD file that you can’t do with an STL.)
2 – Select Printer: Choose from a drop-down menu to find whatever printer(s) is networked to your computer. You can also experiment using templates for printers you don’t yet own, in order to compare build volumes and print times.
3 – Orient/Rotate/Scale Model: Icons along the right panel guide you through placing your model or models on the build platform, letting you rotate them around each axis, choose a face to orient as desired, and scale the part up or down. You can also right-click to copy and paste multiple models, then edit each one separately, move them around, and delete them as desired.
4 – Tray Settings: This icon leads to the menu with choices such as available materials, slice height options, build style (normal or draft), and more; always targeted to the selected printer. These choices apply to all the parts on the tray or build sheet.
5 – Model Settings: Here’s where you choose infill style, infill density (via slider bar), infill angle, and body thickness (also known as shell thickness) per part. Each part can have different choices.
6 – Support Settings: These all have defaults, so you don’t even have to consider them if you don’t have special needs (but it’s where, for example, you would change the self-supporting angle).
7 – Show Slice Preview: Clicking this icon slices the model and gives you the choice to view layers/tool paths individually, watch a video animation, or even set a Z-height pause if you plan on changing filament color or adding embedded hardware.
8 – Print: You’re ready to hit the Print button, sending the prepared file to the printer’s queue.
Scheduling Your Print, and Tracking Print Progress
A clock-like icon on the left-side GrabCAD panel (the second one down, or third if you’ve activated Advanced FDM features) switches the view to the Scheduler. In this mode, you can see a day/time tracking bar for every printer on the network. All prints are queued in the order sent, and the visuals make it easy to see when one will finish and another start (assuming human intervention for machine set-up and part removal, of course).

If you click on the bar representing a part being built, a new panel slides in from the right with detailed information about material type, support type, start time, expected finish time and total material used (cubic inches or grams). For printers with an on-board camera, you can even get an updated snapshot of the part as it’s building in the chamber.
Below the Scheduler icon is the History button. This is a great tool for creating weekly, monthly or yearly reports of printer run-time and material consumption, again for each printer on the network. Within a given build, you’ll even see the files names of the individual parts within that job.
Separately, if you’re not operating the software offline (an option that some companies require), you can enable GrabCAD Print Reports. This function generates detailed graphs and summaries covering printer utilization and overall material use across multiple printers and time periods – very powerful information for groups that need to track efficiencies and expenditures.
And That’s Just the Beginning
Once you decide to experiment with these settings, you begin to see the power of GrabCAD Print for FDM systems. We haven’t even touched on the automated repairs for STL files, PolyJet’s possibilities for colors, transparency and blended materials, or the options for setting up a CAD model so that sub-sections print with different properties.
For example, you’ll see how planning ahead allows you to bring in a multi-body CAD model and have GrabCAD identify and reinforce some areas at full density, while changing the infill pattern, layout, and density in other regions. GrabCAD recognizes actual CAD bodies and faces, letting you make build-modifications that previously would have required layer-by-layer slice editing, or couldn’t have been done at all.
Stay tuned for our next blog post, GrabCAD Print Software, Part Two: Simplify Set-ups, Save Time, and Do Cool Stuff You Hadn’t Even Considered, and reach out to us to learn more about downloading and using GrabCAD Print.
PADT Inc. is a globally recognized provider of Numerical Simulation, Product Development and 3D Printing products and services. For more information on Stratasys printers and materials, contact us at info@padtinc.com.


