 One of the “Holy Grails” of simulation is the ability to take a Finite Element mesh and convert it into geometry that you can then use to create a new mesh or import it into a CAD system as CAD geometry. What most users do not know is that ANSYS, Inc. has a product that can do this - FE Modeler. With the addition of a very affordable Mesh Morpher License users have access to a straightforward process to convert a mesh into geometry.
People usually want to do such a conversion for one of two reasons. The first is the “legacy mesh.” They have a FEA mesh from the past that has no geometry associated with it and they want to make a new mesh or use it to create a mesh around it for CFD. This can also be an STL file from somewhere. The second is that they want to do an analysis or get a CAD part of a part that is distorted in some way by a load. They may want to do a metal forming simulation and get the final shape for their assembly model or they may need to do a flow analysis on a piece of geometry that gets highly distorted.
The Basics:
If you have ever tried to take a mesh to geometry yourself using other tools or a CAD tool, you know it is very hard to do unless you are working with a part made out of nothing but flat planes. This is because the way a tool like this must work is to:
- Take a 3D FEA model and finds only external faces.
- Find edges between faces that can be considered an edge. This is done by looking at the angle between the normals of the faces and if they are above a certain criteria, they are tagged as an edge.
- Gather the edges into loops and find all the element faces enclosed by those loops.
- Fit a cylinder, plane, cone, or NURB surface to the faces and bound them with the edge loops.
If you have a simple, blocky part where all the faces meet at right angles, no problem. But add a few fillets and boom, the tools can never sort out the loops. So what to do?
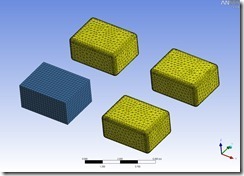
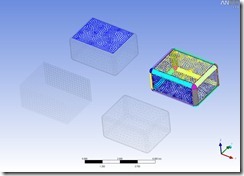
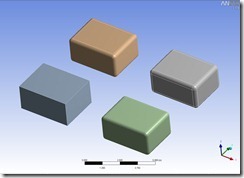
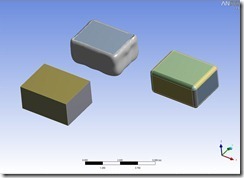
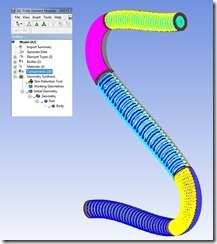
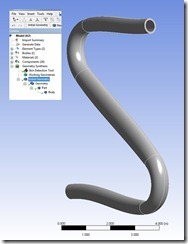
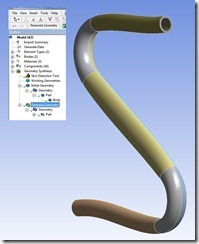
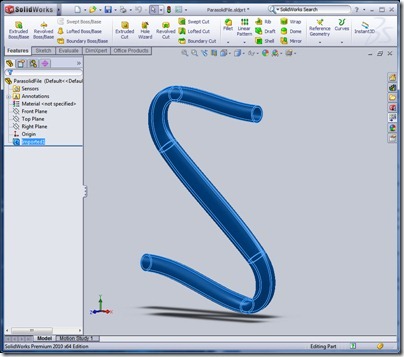
You need to help the algorithm out by splitting up your faces into components (or Named Selections in Workbench speak) and make sure that those components define a chunk of external element faces that are fairly easy for the program to work with. Figures 1-4 show this for some simple blocks.
Block 1 has right angle corners so the algorithm makes quick work of it and finds six surface and 12 edges. Unfortunately, real parts rarely have all right angles.
Block 2 has fillets and a fine enough mesh such that the algorithm can’t find any edges. It tries to turn the entire outer surface of the mesh into one big surface, and fails. No closed loops, bummer.
Block 3 is the same as 2, except that the top surface patch is defined by a nodal component. This gives the algorithm enough information to create two loops and therefore a valid solid. But maybe not what you want because the larger surface kind of wraps around most of the block, and when you try to turn that into a Parasolid it usually fails, as shown in Figure 4.
The 4th block has a component defined for each surface in the original CAD model. The algorithm loves this and makes each patch into a nice surface that then converts to usable CAD geometry. This is fairly easy (if a bit tedious) to do if you are starting with CAD geometry, meshing it, and using the deformed shape to create a new mesh. But if you have just a mesh you will need to be a bit of a Mechanical APDL selection guru to make it happen, but more on that below.
Figure 1: Mesh from *.CDB File
Figure 2: Nodal Components
Figure 3: Surfaces After Detection
Figure 4: CAD Surfaces
The Process:
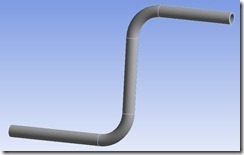
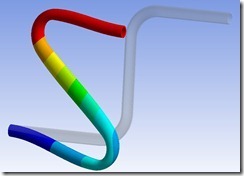
To illustrate the process, we will assume we have a real world problem: You have a piece of tubing as shown in Figure 5 that you want to install into place, but to do so you really have to distort it (Figure 6 is the stress analysis results in the installed shape). As you can see, there is significant ovalization and you need to figure out what the flow will be in this distorted shape.
|
Figure 5: CAD Geometry |
Figure 6: Installed Shape |
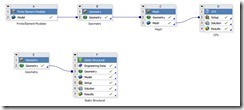
Figure 7: Project Schematic of Stress and Fluid Runs
So the first step is really in the CAD area. You need to use ANSYS DesignModeler to split your geometry up into surfaces that can be easily found and refit by FE Modeler. One thing that always helps is to split any cylinders in half. Break up long, nasty surfaces and merge together any small and complex ones. You can create your components (Named Selections) here or in ANSYS Mechanical, your call. But either way every surface that is not a plane needs to be given an individual name. If your CAD systems supports it, you can do it in the CAD system as well before you slice and prep in ANSYS DesignModeler.
| While I was writing this article Matt Sutton was doing Part 3 of his Mechanical Scripting HOWTO. I asked him if he could make an example script that would automatically create a Named Selection for each surface in a part. You can find it here:
https://www.padtinc.com/blog/post/2011/01/05/An-ANSYS-Mechanical-Scripting-Example If you have complex geometry, this script is highly recommended. |
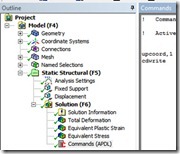
Next, move into ANSYS mechanical and set up your analysis like you normally would. If you didn’t bring over Named Selections, define them now. Now you need to insert a simple code snippet into the Solution Branch with two commands:
| upcoord, 1 cdwrite |
The UPCOORD command tells MAPDL to take the current solution (by default the last load step. If you want a different point in the solution, you need to add a SET command first) and move the nodes to the deflected shape that has been calculated. After this command your nodes are in your deformed shape. The CDWRITE command simply writes the model to a text file, and because your nodes are in the deflected position, that file will contain your distorted geometry. Run your analysis and when it is done, the snippet is executed and the *.cdb file is written. If you already have a solution and do not want to rerun, just go into ANSYS MAPDL and type the commands into /POST1.
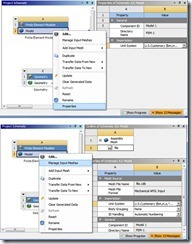
Now that you have the distorted mesh, you need to get it into FE modeler. Create a new standalone FE Modeler system and RMB on Model and choose Add Input Mesh… Your *.cdb file is going to be in your project directory in the dp0/sys/Mech directory (of course, this assumes that you only have the one model in your project. Use the appropriate dp* and sys* to identify your file if you are using something other than the first model in your project).
If you are not using SI units you will need to set the properties for the FE Modeler system and for the file in the Project Schematic or things will get all messed up. To do this RMB on the Model cell and choose properties. Set the units for FE Modeler here. Then RMB again on the cell and choose Manage Input Meshes. This shows the file in the outline view and when you click on it, you can change the Unit System property.
Figure 8.5: Setting Units on FE Modeler and on your input mesh file
Launch FE modeler and make sure your mesh came in without any problems. Check the Bodies and the Element types, etc… Then look at your components in the tree. Note that it not only captured the surface components you defined, any nodal constraint or load that you defined will show up as well. You may need to delete some components. You can also use the selection capabilities in FE Modeler to make new components.
Once you are happy with that, it is time to let the program find faces. Select Geometry Synthesis in the tree and then in the Details make sure that “Use Node Components” is set to Yes! This is very important and the most common mistake users make.
Figure 9: Nodal Components in FE Modeler
Now click on the Initial Geometry icon and it will go do its thing.
If you get bad surfaces, you need to go back and add more components and break things up a bit. but if it works you should see a solid of your part. You are not done yet. These are not “CAD” surfaces but rather faceted (a bunch of triangles) surfaces.
Figure 10: Deformed Faceted Surface
Select Initial Geometry in the tree and you should see a “Convert to Parasolid” icon on the ribbon bar. Click that and it will use the Parasolid modeling kernal to try and fit your surfaces. This can take a while on a complex part. If you split things up well enough and your mesh was fine enough, you should now have a surface model of your geometry!
Figure 11: Parasolid Surface Geometry in FE Modeler
If you geometry is simple, it will even sew it into a solid. But if the little icon next to your part in the tree is a surface and not a block, you still need to sew things together. Do this by choosing the Add a Sew Tool icon or RMB-> Add a Sew Tool. Select the surfaces you want to sew, using the tree being the easiest way to select all of them. Then hit the generate button and see what you get. If it does not make a solid, make the tolerance number a bit bigger. If that still does not work, you may need to export the surfaces to a CAD tool with good surfacing and sew it there.
To export your distorted geometry, select Parasolid Geometry in the tree and choose Export to a Parasolid File or RMB-> Export to a Parasolid File.
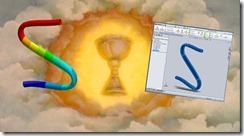
You have done it, you have real CAD geometry of your deformed shape!
Figure 12: The Holy Grail: You Distorted Geometry in Your CAD System
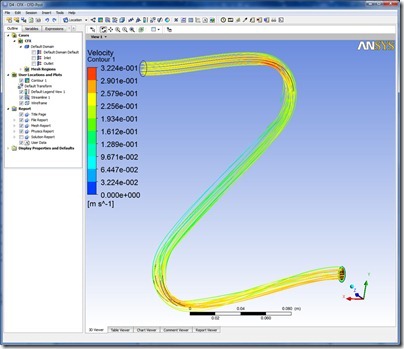
Getting the distorted shape into CAD is pretty critical, at least now your drawings are realistic instead of some guess at the installed shape. But if you need to do more analysis, that proceeds like any other simulation. You read in your CAD geometry (CAD geometry you made from distorted nodes, yea, that is what I’m talking about! Hoooo haaaa!) and set it up for your analysis and run it. In our example we took the Parasolid file into DM and created a fluid volume inside the pipe (which is way easy to do in DM) and then did a CFD run.
All in ANSYS products, all within the Workbench Environment.
Starting with a Legacy Mesh or STL file:
The reason why the above method worked so well is that we had original CAD geometry that we could make components for. When you start with just a legacy mesh without components you need to get in there an make nodal components on the surface. FE Modeler has some basic node picking capabilities that you can use, but for real parts you really need to get into ANSYS Mechanical APDL and use the following method:
- Use ESURF with MESH200 elements to create a surface mesh from your solid mesh.
- Delete the solid mesh
- Use picking, selection commands and such to break those elements into surfaceable chunks.
- When you have things split up fairly well, CDWRITE to make a CDB file for FE Modeler.
This can be pretty tedious, but a bit of up-front work will result in nicer surfaces, or determine if you even get a solid model.
Comments:
The guts of this product have been around for many release with a couple of different names, Paramesh being the most common. At R13 we have really found that it is robust and usable for simple to moderately complex geometry. The key are the nodal components. Set those up right and it should work out.
We have also found that working with a refined mesh is much better than a coarse one. So if you are running an analysis to get a distorted shape, you may want more refinement than the analysis actually requires, in order to get good surfaces for a distorted solid model.
It should be noted, that although this is a pretty amazing tool, it can not do miracles. Really complex, distorted or coarse meshes just will not work. But do not give up. Get what surface you can into your CAD system and patch it up there. 
You can download the project that has the blocks and the distorted tube and take a look at this yourself, or try it with your own geometry. You will need to ask your ANSYS sales professional for a temp key of ANSYS Mesh Morpher to use this tool. Play with it, get a feel for it.
So, next time your boss says “Bring me…. a…… CAD file of a Deflected Shrubbery!” you know what to do.

