If you have been following PADT closely for a while, you know that we have been working hard to find good scanning solutions for our customers since we started the company twenty years ago. For many years we recommended professional inspection service providers that used traditional CMM devices to reverse engineer or inspect parts, we just didn’t have a good scanning solution in-house.
A few years back we found a great solution for many of our customers when we started using and selling Cross Sectional Scanners (CSS) from CGI. This technology works great with plastic parts and is highly accurate, especially for parts with internal features. However we still needed a solution for metal parts and parts that you can’t chop up when you inspect them.

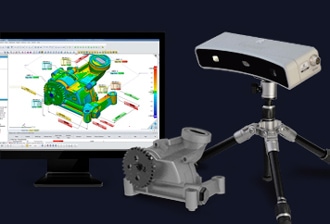
Then Geomagic introduced the Geomagic Capture system and we gave it a try. We feel that we now have a desktop scanning solution that we can recommend to customers and we have proven we can do engineering services work with. So we now sell the Geomagic Capture scanning system and provide non-destructive 3D scanning as a service.
Not a Laser
The big difference with this system is that it is not a laser scanner. It actually is a blue Structured-Light scanner. Basically it projects a pattern of lines onto an object, and measure how the lines deviate from being straight. That deviation gives a very accurate measurement of the location of points on the surface of the object. No laser, no reflective dots, no problems with stray data.

In our testing the system seems to work on a variety of surface types and shapes. If the object is reflective or too dark, you simply cover it with a chalky powder and everything is good. Not using lasers, the device is also relatively small and compact.
A System: Hardware and Software
One of the reasons why we like this particular scanner over others is that it is a solution that contains both hardware and software. In fact, the scanner technology itself has been around for some time. What makes this scanner our choice is that Geomagic, experts in dealing with the output from scanners, developed the software that gathers and massages the data coming from the scanner. This makes a huge difference in ease of use.
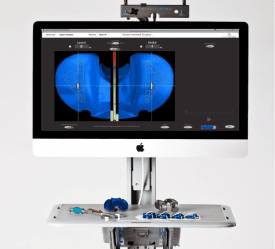
Our engineers are still learning all the ins-and-outs on the system, but they were able to do productive work with it almost right out of the box. The software steps you through the process and give really nice visual feedback while you are setting up a scan. This avoid the need to scan, review, fix something, try again, check… round and round. And once you have good point data, you have the full suite of Geomagic tools to convert it into an STL file or into a usable CAD model.
When you purchase the Geomagic Capture system you have your choice of:
- Geomagic Capture for SolidWorks
Add-in software for SolidWorks, that presents the Geomagic tools you need in the SolidWorks interface you are used to working with. - Geomagic Capture for SpaceClaim
Add-in software for SpaceClaim, combining best-in-class scanning, facet, and point cloud tools with a robust direct solid modeler, all in the same interface. - Geomagic Capture for Design X
Powerful and comprehensive advanced reverse engineering that allows you to create feature-based CAD models directly from your scan data. - Geomagic Capture for Design Direct
A bundle that includes SpaceClaim and the Geomagic Capture plug-in as a complete solution for those that do not have a CAD system that supports working with point data. This package is best if you have a CAD package other than SolidWorks or SpaceClaim.
Specifications
Here are the specifications for the system:
| Specification | Value | |
|---|---|---|
| Scan Speed | 0.3 sec per scan | |
| Field of View (Diagonal)/Near End – Far End | 172 – 260 mm 6.77 – 10.24 in |
|
| Field of View (X-Y)/Near End – Far End | 123×120 – 192×175 mm 4.84×4.72 – 7.56×6.89 in |
|
| Clearance Distance | 300 mm 11.81 in |
|
| Depth of Field | 180 mm 7.09 in |
|
| Resolution | Average Points | 985,000 per scan |
| Average Polygons | 1.97 million per scan | |
| Point to Point Distance | 0.162 mm 0.000638 in (at center of volume) |
|
| Accuracy / Near End – Far End | 60 – 118 microns | |
| Calibration | Pre-calibrated | |
Try it on Your Part
The best way to see if this is the right scanner for you is to contact PADT and have us do a scanning job for you. As always with PADT we will not just do the work, but we will show you what we did and help you to see what your best solution is.


