Twenty-one. that is the number of years that I have been using SolidEdge. This classifies me as an old dog, a very old dog. As PADT has grown the amount of CAD I do has gone way down, but every once in a while I need to get in there and make some geometry happen. I’m usually in a hurry so I just pop in to SolidEdge and without really thinking, I get things done.
Then ANSYS, Inc. had to go and buy SpaceClaim. It rocks. It is not just another solid modeler, it is a better way to create, repair, and modify CAD. I watch our engineers and customers do some amazing things with it. I’m still faster in SolidEdge because I have more years of practice than they have been adults. But this voice in my head has been whispering “think how fast you would be in SpaceClaim if you took the time to learn it.” Then that other voice (I have several) would say “you’re too old to learn something new, stick with what you know. You might break your hip”
I had used SpaceClaim a bit when they created a version that worked with ANSYS Mechanical four or five years ago, but nothing serious. Last month I attended some webinars on R17 and saw how great the tool is, and had to accept that it was time. That other voice be damned – this old dog needs to get comfortable and learn this tool. And while I’m at it, it seemed like a good idea to bring some others along with me.
These posts will be a tutorial for others who want to learn SpaceClaim. Unlike those older tools, it does not require five days of structured training with workshops. The program comes with teaching material and tutorials. The goal is to guide the reader through the process, pointing out things I learned along the way, as I learn them.
A link to the table of contents is here.
Getting Started
The product I’m learning is ANSYS SpaceClaim Direct Modeler, a version of SpaceClaim that is built into the ANSYS simulation product suite. There is a stand alone SpaceClaim product but since most of our readers are ANSYS users, I’m going to stick with this version of the tool.
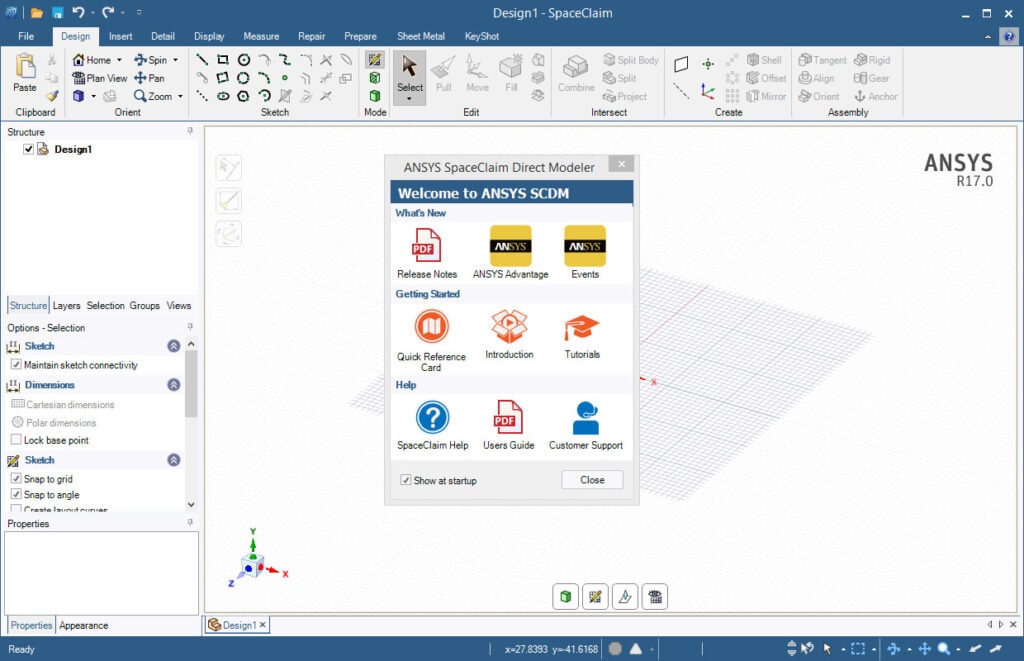
This is what you see when you start it up:
I’ve been using the same basic layout for 20 years, so this is a bit daunting for me. I like to start on a new program by getting to know what different areas of the user interface do. The “Welcome to ANSYS SCDM” kind of anticipates that and gives me some options.
Under “Getting Started” you will see a Quick Reference Card, Introduction, and Tutorials. Open up the Quick Reference and print it out. Don’t bother with it right now, but it will come in handy, especially if you are not going to use SpaceClaim every day.
The Introduction button is a video that gets you oriented with the GUI. Just what we need. It is a lot of information presented fast, so you are not going to learn everything the first viewing, but it will get you familiar with things.
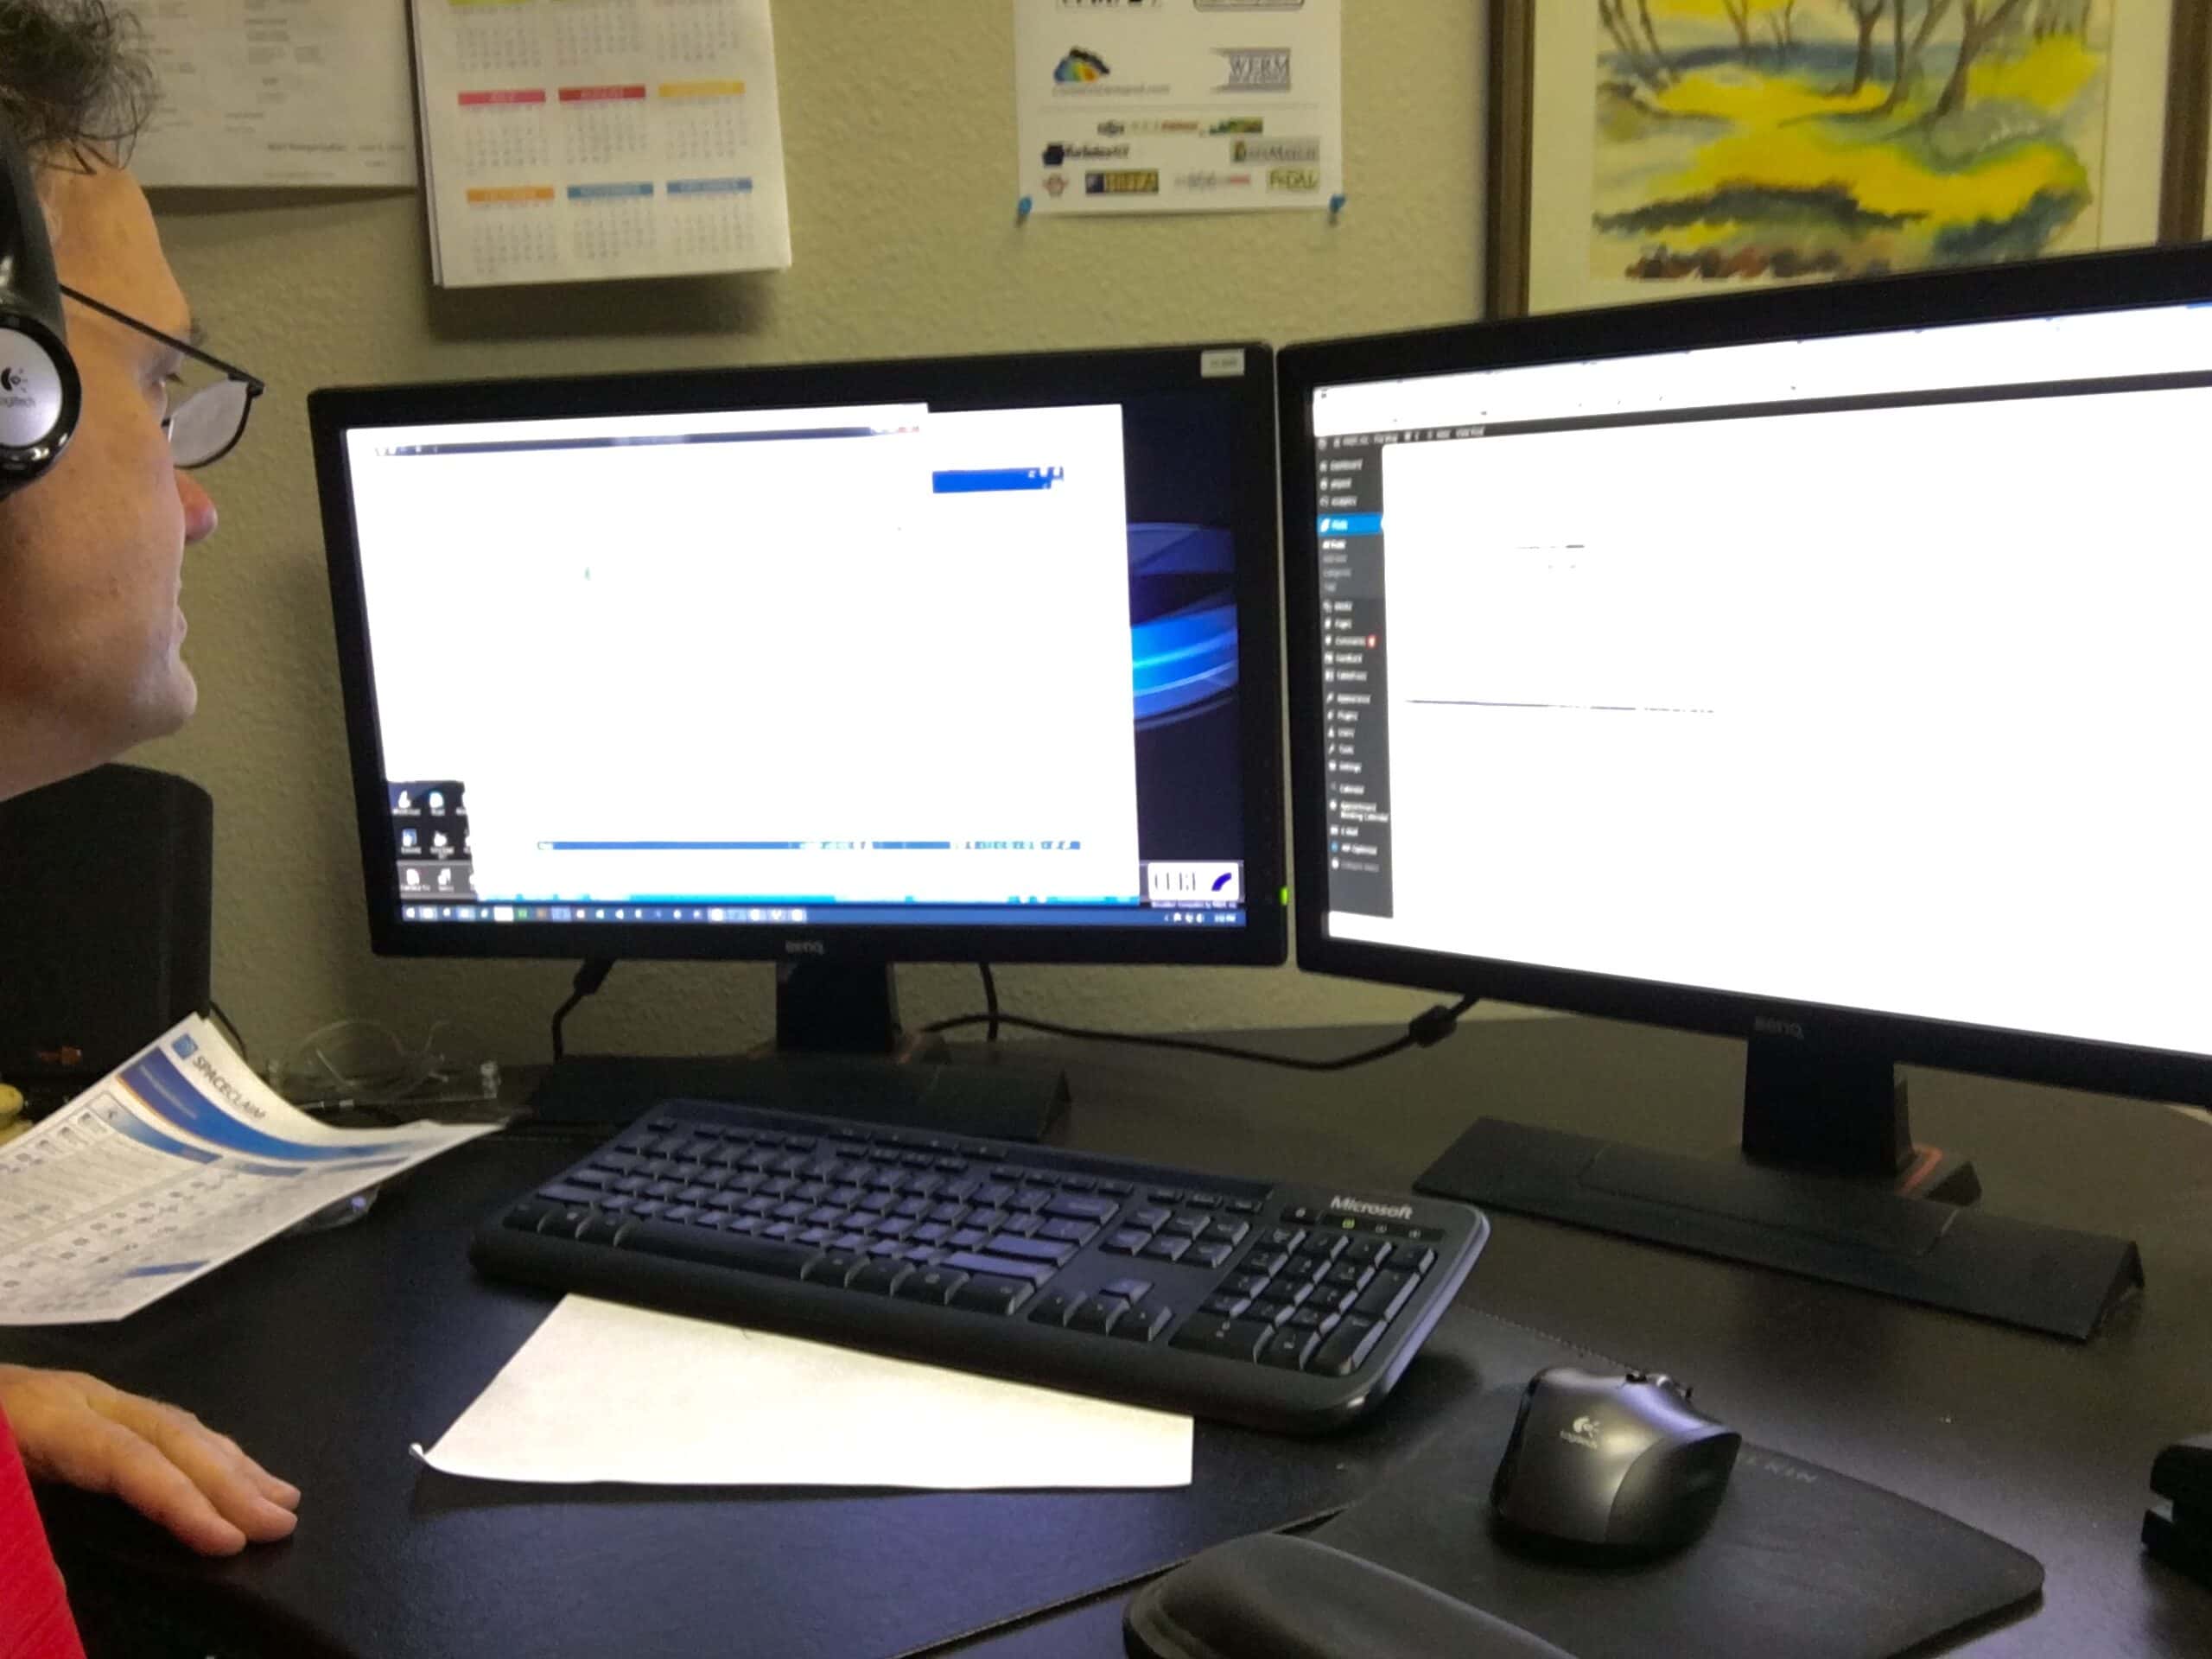
Here I am watching the video. Notice how attentive I am.
Once that is done you should sort of know the basic lay of the land. Kind of like walking into a room and looking around. You know where the couch is, the window, and the shelf on one wall. Now it is time to explore the room.
It is kind of old school, but I like user guides. You can open the SpaceClaim User Guide from the Help line in the “Welcome” window. I leave it open and use it as a reference.
The Interface
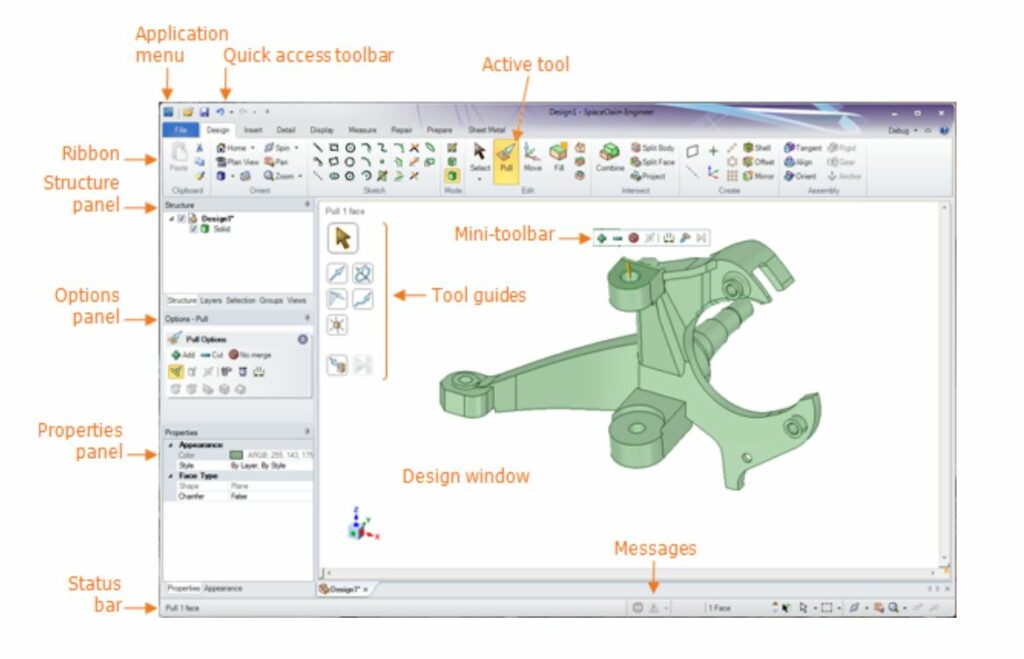
The best place to learn where things are in the interface is to look at the interface section in the manual. It has this great graphic:
The top bit is pretty standard, MS office like. You have your application menu, quick access toolbar, and Ribbon Bar. The Ribbon Bar is where all the operations sit. We used to call these commands but in an object oriented world, they are more properly referred to as operations – do something to objects, operate on them. I’ll come back and explore those later. Over on the left there are panels, the thing we need to explore first because they are a view into our model just like the graphics window.
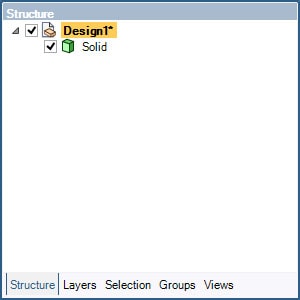
The Structure Panel is key. This is where your model is shown in tree form, just like in most ANSYS products. In SpaceClaim your model is collection of objects, and they are shown in the tree in the order you added them. You can turn visibility on and off, select objects, and act on objects (using the right mouse button) using the tree. At this point I just had one solid, so pretty boring. I’m sure it will do more later.
Take a look at the bottom of the Structure Panel and you will find some tabs. These give access to Layers, Selection, Groups, and Views. All handy ways to organize and interact with your model. I felt like I needed to come back to these later when I had something to interact with.
TIP: If you are like me, you probably tried to drag these panels around and hosed up your interface. Go to File > SpaceClaim Options (button at the bottom) > Appearance and click the “Reset Docking Layout” button in the upper right of the window. Back to normal.
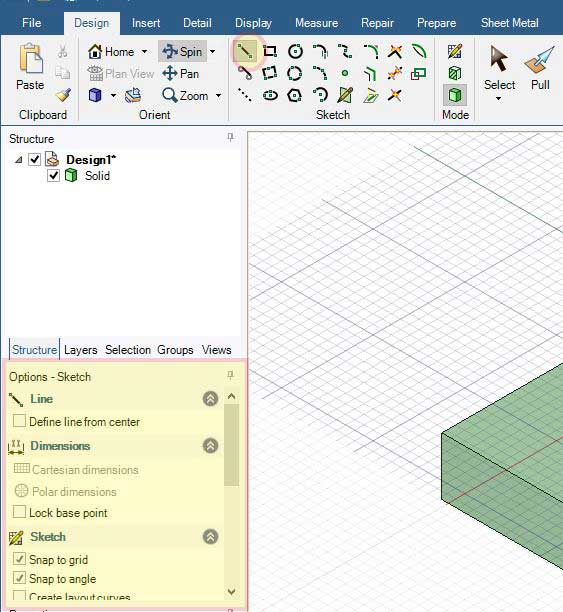
The options panel changes dynamically as you choose things from the ribbon. If you click on the Design > Line you get this:
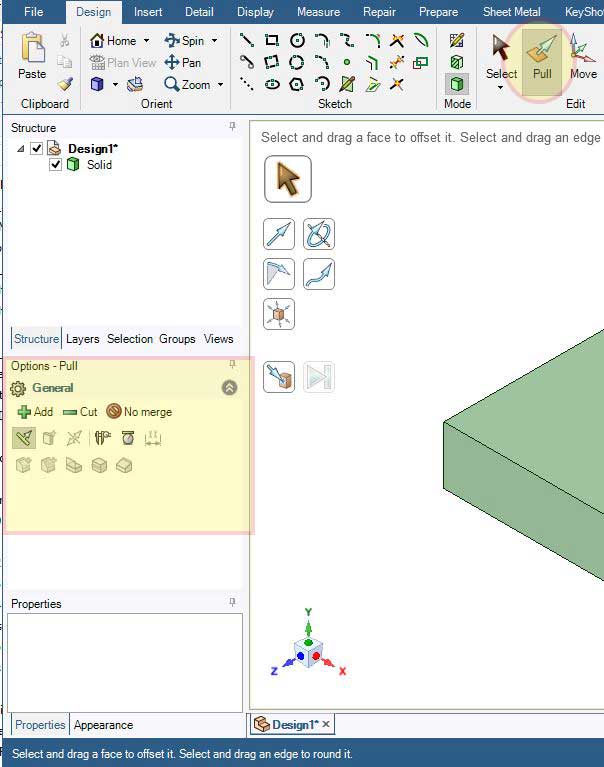
And if you click on Pull you get this:
Keeps the clutter down and makes the commands much more capable.
Below that is the Properties Panel. If the Options panel is how you control an operation, then the Properties panel is how you view and control an object in your model. No point in exploring that till we have objects to play with. It does have an appearance tab as well, and this controls your graphics window.
At the bottom is the Status Bar. Now I’m a big believer in status bars, and SpaceClaim uses theirs well. It tells you what is going on and/or what to do next. It also has info on what you have selected and short cut icons for selection and graphics tools. Force yourself to read and use the status bar, big time saver.
The last area of the interface is the graphics window. It of course shows you your geometry, your model. In addition there are floating tools that show up in the graphics window based upon what you are doing. Grrr. #olddogproblem_1. I’m not a fan of these, cluttering up my graphics. But almost all modern interfaces work this way now and I will have to overcome my anger and learn to deal.
Make Something
For most of the 30+ years that I’ve been doing this CAD thing, I’ve always started with the same object: A block with a hole in it. So that is what we will do next. I have to admit I’m a little nervous.
I’m nervous because I’m a history based guy. If you have used most CAD tools like SolidWorks or ANSYS DesignModeler you know what history based modeling is like. You make a sketch then you add or subtract material and it keeps track of your operations. SpaceClaim is not history based. You operate on objects and it doesn’t track the steps, it just modifies your objects. SolidEdge has done this for over ten years, but I never got up the nerve to learn how to use it. So here goes, new territory.
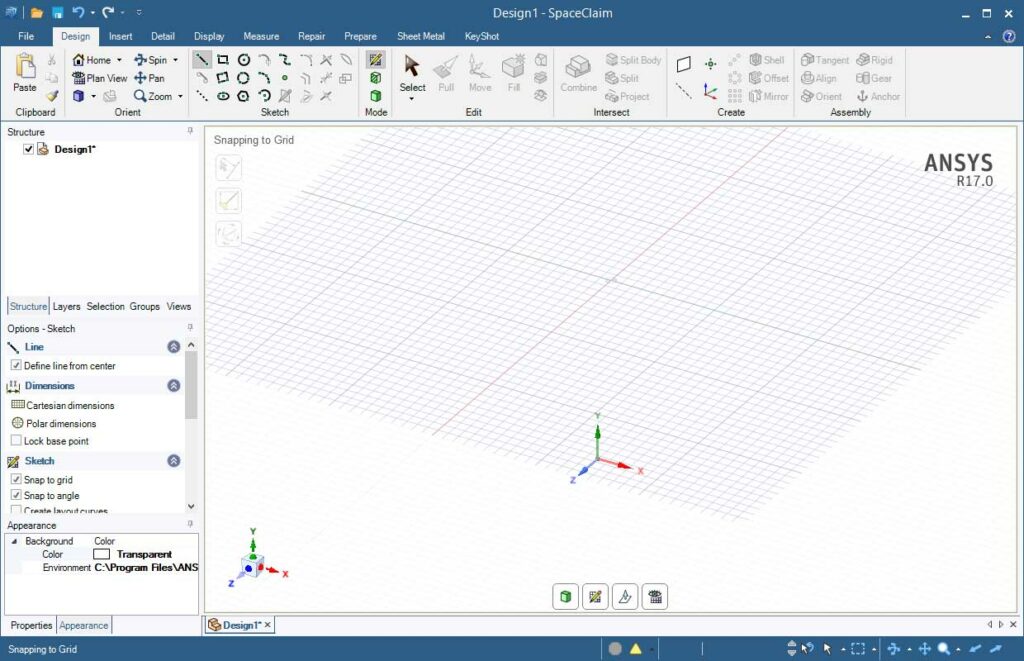
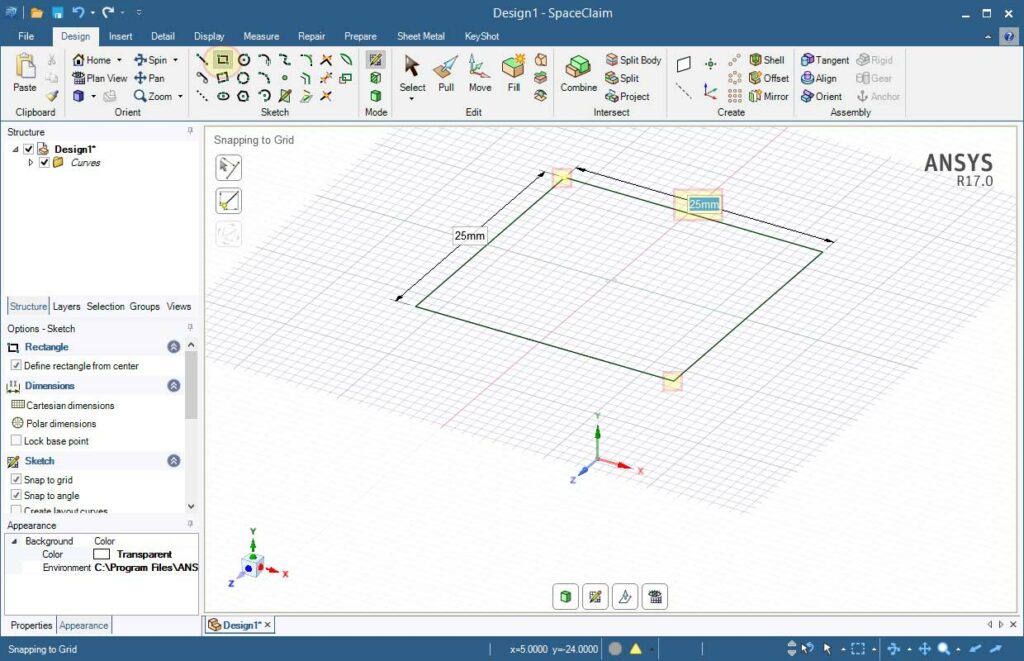
Things start the same way. But instead of a sketch you make some curves. The screen looks like this when you start:
The default plane is good enough, so I’ll make my curves on that. Under Design>Sketch click on the Rectangle icon then move your mouse on to the grid. You will notice it snaps to the grid. Click in the Upper Left and the Lower Right to make a rectangle then enter 25mm in to each text box, making a 25 x 25 square:
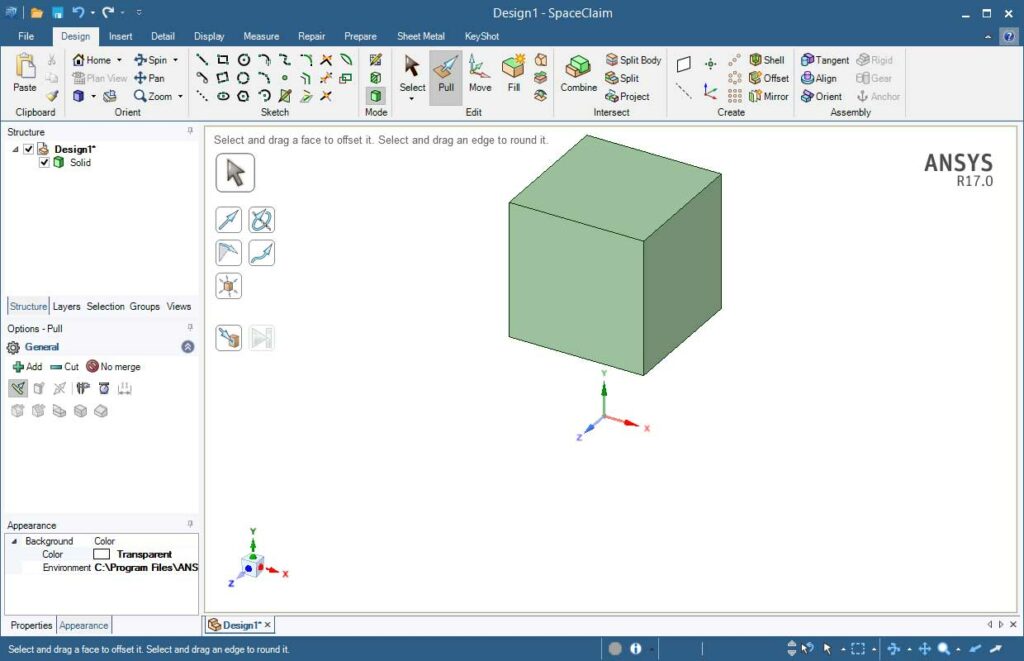
Next we want to make our block. In most tools you would find an extrude operation. But in SpaceClaim they have combined the huge multitude of operations into a few operation types, and then use context or options to give you the functionality you want. That is why the next thing we want to do is click on Pull on the Edit group.
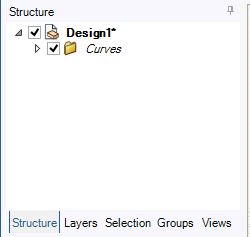
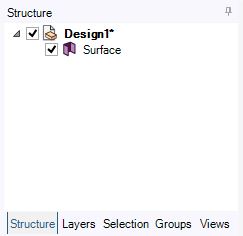
But first, notice something important. If you look at the model tree you will notice that you have only one object in your design, Curves. When you click Pull it gets out of sketch mode and into 3D mode. It also automatically turns your curves into a surface. Look at the tree again.
This is typical of SpaceClaim and why it can be so efficient. It knows what you need to do and does it for you.
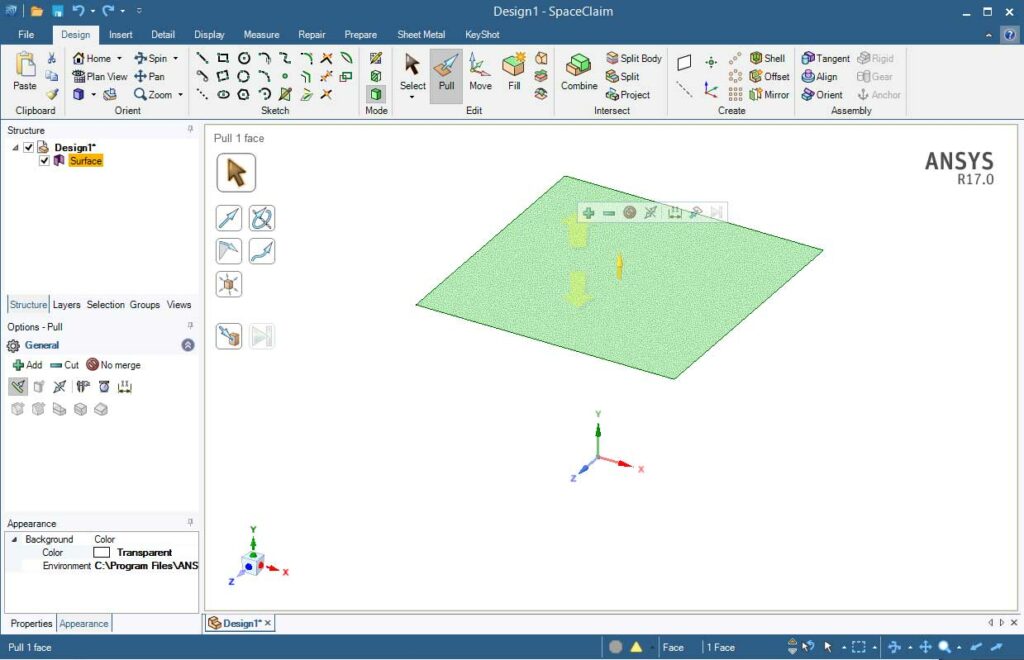
Move you mouse over your newly created surface and notice that it will show arrows. Move around and put it over a line, it shows what object will be selected if you click. Go to the inside of your surface and click. It selects the surface and shows you some options right there.
Drag your mouse over the popup menu and you can see that you can set options like add material, subtract material, turn off merging (it will make a separate solid instead of combining with any existing ones), pull both directions, get a ruler, or specify that you are going to pull up to something. For now, we are just going to take the default and pull up.
As you do this the program tells you how far you are pulling. You can type in a value if you want. I decided to be boring and I put in 25 mm. Geometry has been created, no one has been hurt, and I have not lost feeling in any limbs. Yay.
On the status bar, click on the little menu next to the magnifying glass and choose Zoom Extents. That centers the block. Whew. That makes me feel better.
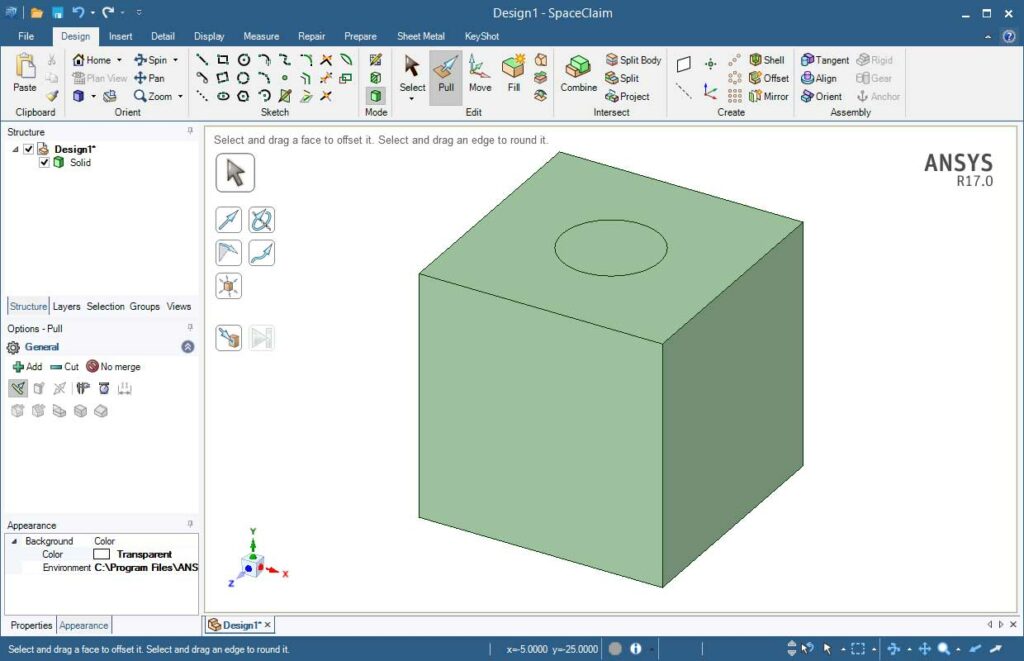
Now for the hole. It is the same process except simpler than in most tools. Click on the circle tool in Sketch. The grid comes back and you can use that to sketch, or you can just click on the top of the block. Let’s do that. The grid snaps up there. To make the circle click in the middle of the grid and drag it out. Put 10 in for the diameter. A circle is born.
Take a look at your tree. You have a solid and a set of curves. 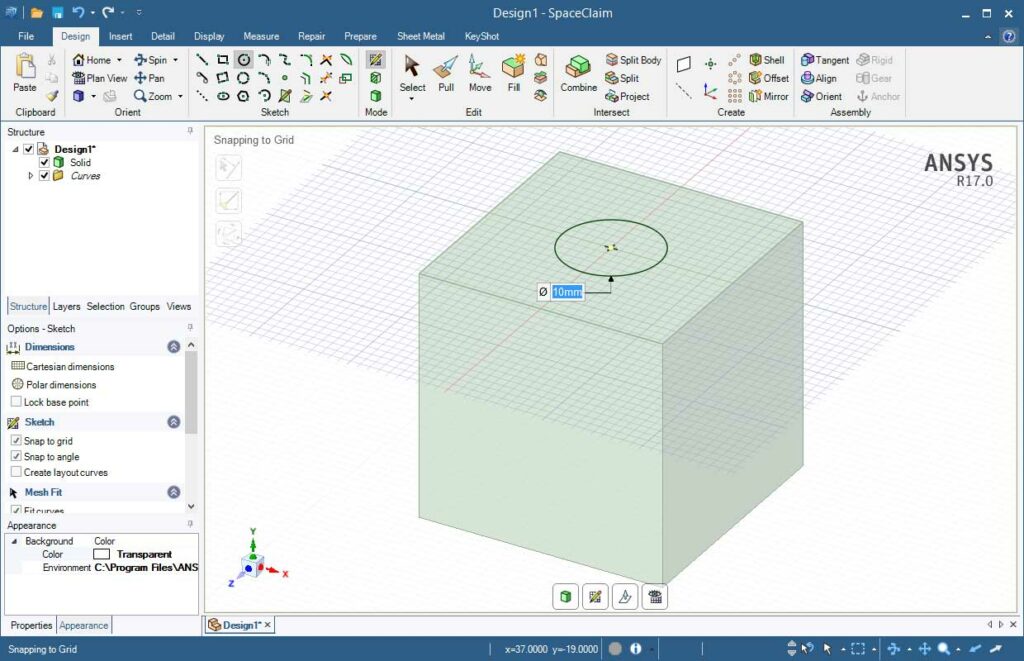
Now choose Pull from the Edit section. There is only a Solid now?
SpaceClaim went ahead and split that top surface into two surfaces. Saving a step again.
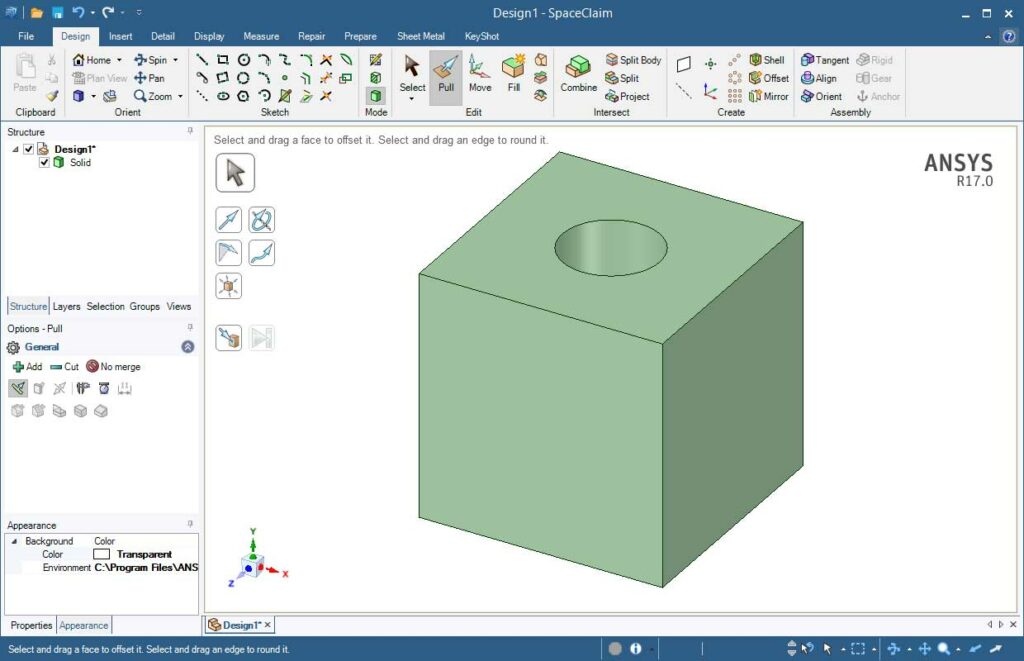
Click on the circle surface and drag it up and down. If you go up, it adds a cylinder, if you go down, it automatically subtracts. Go ahead and pull it down and through the block and let go. Done. Standard first part created. Use the File>Save command to save your awesome geometry.
That is it for the getting started part. In the next post we will use this geometry to explore SpaceClaim more, now that we have an object to work on. As you were building this you probably saw lots of options and input and maybe even played with some of it. This is just a first look at the power inside SpaceClaim.
Click here for Post 2 where the Pull command is explored.

