PADT’s Austin Suder is a Solidworks CAD wizard, a NASA design-competition (Two for the Crew) winner and a teaching assistant for a course in additive manufacturing (AM)/3D printing. Not bad for someone who’s just started his sophomore year in mechanical engineering at Arizona State University.
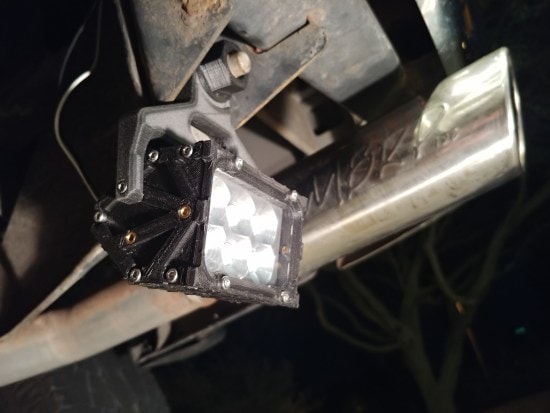
In last month’s PADT blog post about adding heat-set inserts to 3D printed parts we gave a shout-out to Austin for providing our test piece, the off-road LED light unit he had designed and printed for his 2005 Ford F-150. Now we’ve caught up with him between classes to see what other additions he’s made to his vehicle, all created with his personal 3D printers and providing great experience for his part-time work with Stratasys industrial printers in PADT’s manufacturing department.
Q: What has inspired or led you to print multiple parts for your truck?
I like cars, but I’m on a college budget so instead of complaining I found a way to fix the problem. I have five 3D printers at my house – why not put them to work! I understand the capabilities of AM so this has given me a chance to practice my CAD and manufacturing skills and push boundaries – to the point that people start to question my sanity.
Q: How did you end up making those rear-mount LED lights?
I wanted some reverse lights to match the ones on the front of my truck, so I designed housings in SolidWorks and printed them in carbon fiber PLA. Then I soldered in some high-power LED lights and wired them to my reverse lights. These parts made great use of threaded inserts! The carbon fiber PLA that I used was made by a company called Vartega that recycles carbon fiber material. (Note: PADT is an investor of this company.)
Q: In the PADT parking lot, people can’t help but notice your unusual tow-hitch. What’s the story with that?
I saw a similar looking hitch on another car that I liked and my first thought was, “I bet I could make that better.” It’s made from ABS painted chrome (not metal); I knew that I would never use it to tow anything, so this opened up my design freedom. This has been on my truck for about a year and the paint has since faded, but the printed parts are still holding strong.
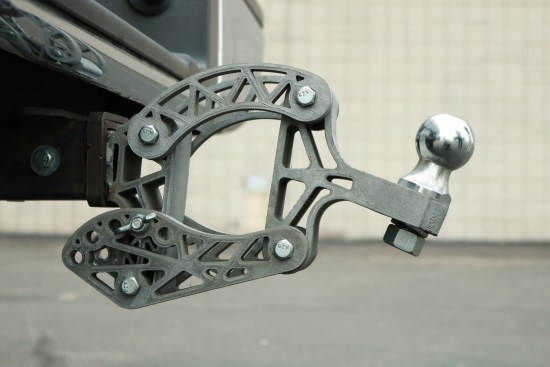
This part also gets questioned a lot! It’s both a blessing and a curse. In most cases it starts when I’m getting gas and the person behind me starts staring and then questions the thing that’s attached to the back of my truck. The conversation then progresses to me explaining what additive is, to a complete stranger in the middle of a gas station. This is the blessing part because I’m always down for a conversation about AM; the downside is I hate being late for work.
Q: What about those tow shackles on your front bumper?

Those parts were printed in ABS – they’re not meant for use, just for looks. I’ve seen towing shackles on Jeeps and other trucks but never liked the look of them, so again I designed my own in this pentagon-shape. I originally printed them in red but didn’t like the look when I installed them; the unusual shading comes because I spray-painted them black then rubbed off some of the paint while wet so the red highlights show through.
Q: Have you printed truck parts in any other materials?
Yes, I‘ve used a carbon-fiber (CF) nylon and flexible TPU (thermoplastic polyurethane) on filament printers and a nylon-like resin on a stereolithography system.
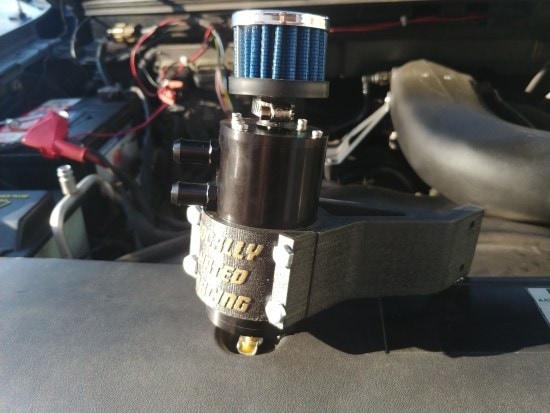
The CF nylon worked well when I realized my engine bay lacked the real estate needed for a catch can I’d bought. This was a problem for about five minutes – then I realized I have the power of additive and engineered a mount which raised the can and holds it at an angle. The mount makes great use of complex geometry because AM made it easy to manufacture a strong but custom-shaped part.
After adding the catch can to my engine, I needed a way to keep the hoses from moving around when driving so I designed a double S-clip in TPU. The first design didn’t even come close to working – the hoses kept coming loose when driving – so I evaluated it and realized that the outer walls needed to be thicker. I made the change and printed it again, and this time it worked great. In fact, it worked so well that when I took my truck to the Ford dealership for some warranty work, they went missing. (It’s OK Ford, you can have them – I’ll just print another set.)
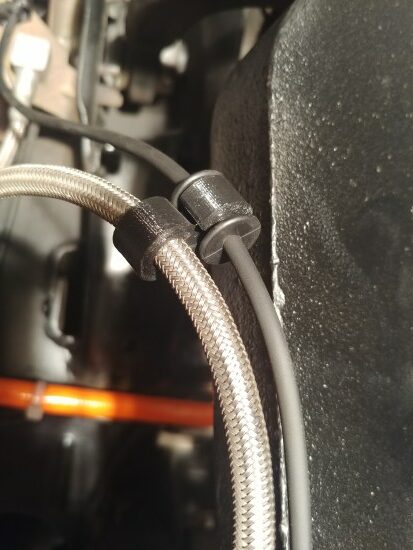
Other parts I printed in TPU included clips for the brake-lines. I had seen that my original clip had snapped off, so when I had the truck up on jacks, I grabbed my calipers and started designing a new, improved version. Thirty minutes later I had them in place.
I also made replacement hood dampeners from TPU since they looked as though they’d been there for the life of the truck. I measured the old ones, used SolidWorks to recreate them (optimized for AM), printed a pair and installed them. They’ve been doing great in the Arizona heat without any deformation.
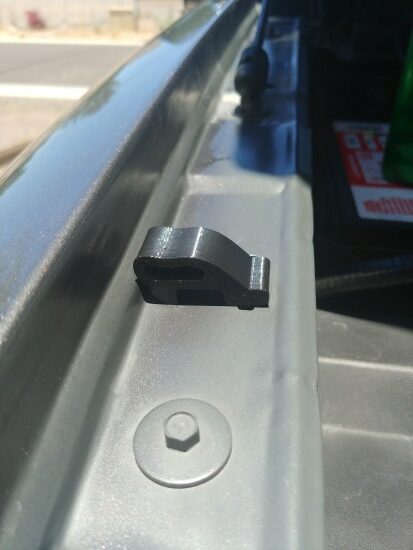
My last little print was done on my SLA system in a material that behaves like nylon. (This was really just me showing off.) The plastic clips that hold the radiator cover had broken off, which led me to use threaded sheet-metal inserts to add machine threading to the fixture. I then purchased chrome bolts and made some 3D printed cup-washers with embossed text for added personalization and flair.

Q: What future automotive projects do you have in mind?
I’m working on a multi-section bumper and am using the project to standardize my production process – the design, material choice, sectioning and assembling. I got the idea because I saw someone with a tube frame car and thought it looked great, which led to me start thinking about how I could incorporate that onto my truck.
When I bought my F-150, it had had a dent in the rear bumper. I was never happy with this but didn’t have the money to get it fixed, so at this point the tube-frame look came full circle! I decided that I was going to 3D print a tube-frame bumper to replace the one with a dent. I started by removing the original bumper, taking measurements and locating possible mounting points for my design. Then I made some sketches and transferred them into SolidWorks.
The best part about this project is that I have additive on my side. Typical tube frame construction is limited by many things like bend allowance, assembly, and fabrication tooling. AM has allowed me to design components that could not be manufactured with traditional methods. The bumper will be constructed of PVC sections connected by 50 ABS printed parts, all glued together, smoothed with Bondo and filler primer then painted black. This is a large project! It will take a lot of hand-finishing, but it will be perfect.
Q: If you were given the opportunity to work on any printer technology and/or material, what would you want to try working with?
Great question! If I had the opportunity to use AM for automotive components, I would redesign internal engine components and print them with direct metal laser sintering (DMLS), one of PADT’s other AM technologies. I would try printing part like piston rods, pistons, rocker arms, and cylinder valves. Additive is great for complex geometries with exotic materials.
Go Austin! Can’t wait to see what your truck looks like when you visit over semester break.
To learn more about fused deposition modeling (FDM/filament), stereolithography (SLA), selective laser sintering (SLS) and DMLS printers and materials, contact the PADT Manufacturing group; get your questions answered, have some sample parts printed, and share your success tips.
PADT Inc. is a globally recognized provider of Numerical Simulation, Product Development and 3D Printing products and services. For more information on Insight, GrabCAD and Stratasys products, contact us at info@padtinc.com.


