For decades in the medical world, surgeons and their professional support teams have relied on X-rays, computed tomography (CT) scans and magnetic resonant imaging (MRI) data when performing their pre-surgical planning approach. These diagnostic tools have been literal lifesavers, yet the resolution and 2D perspective of these images can make it difficult to determine the full details of anatomical geometry. Subtle, critical abnormalities or hidden geometries can go unnoticed when viewing flat films and digital displays.

With the advent of 3D printing, many surgeons are now using 3D models for both surgical planning and patient communication. While cost is the primary hold-back, such models are seeing increased use. In addition, efforts are underway to quantify the benefits of reduced operating room time/expense and improved patient outcome; see Medical 3D Printing Registry (ACR/RSNA). Supporting this concept are the high-resolution, multi-material PolyJet 3D printers from Stratasys.
But how does the patient’s CT and MRI data become a unique 3D printed model you can hold in your hand? How do you segment out the areas of interest for a particular analysis or surgical model? This blog post describes the necessary steps in the workflow, who typically performs them, and the challenges being addressed to improve the process every step of the way.
Data Acquisition of Patient Anatomy
When we think of imaging throughout the decades, X-ray technology comes to mind. However, classic single 2D images on film cannot be used to drive 3D models because they are qualitative not quantitative. The main options that do work include the series of x-rays known as CT scans, MRI data, and to a lesser extent computed tomography angiography (CTA) and magnetic resonant angiography (MRA). Each approach has pros and cons and therefore must be matched to the proper anatomy and end use.
CT scans comprise a series of x-rays evenly spaced laterally across a particular body section, typically generating several hundred image files. These can be quickly acquired and offer high resolution, however, they do not do well displaying different types of soft tissue, and the process relies on extended exposure to a radiation source.
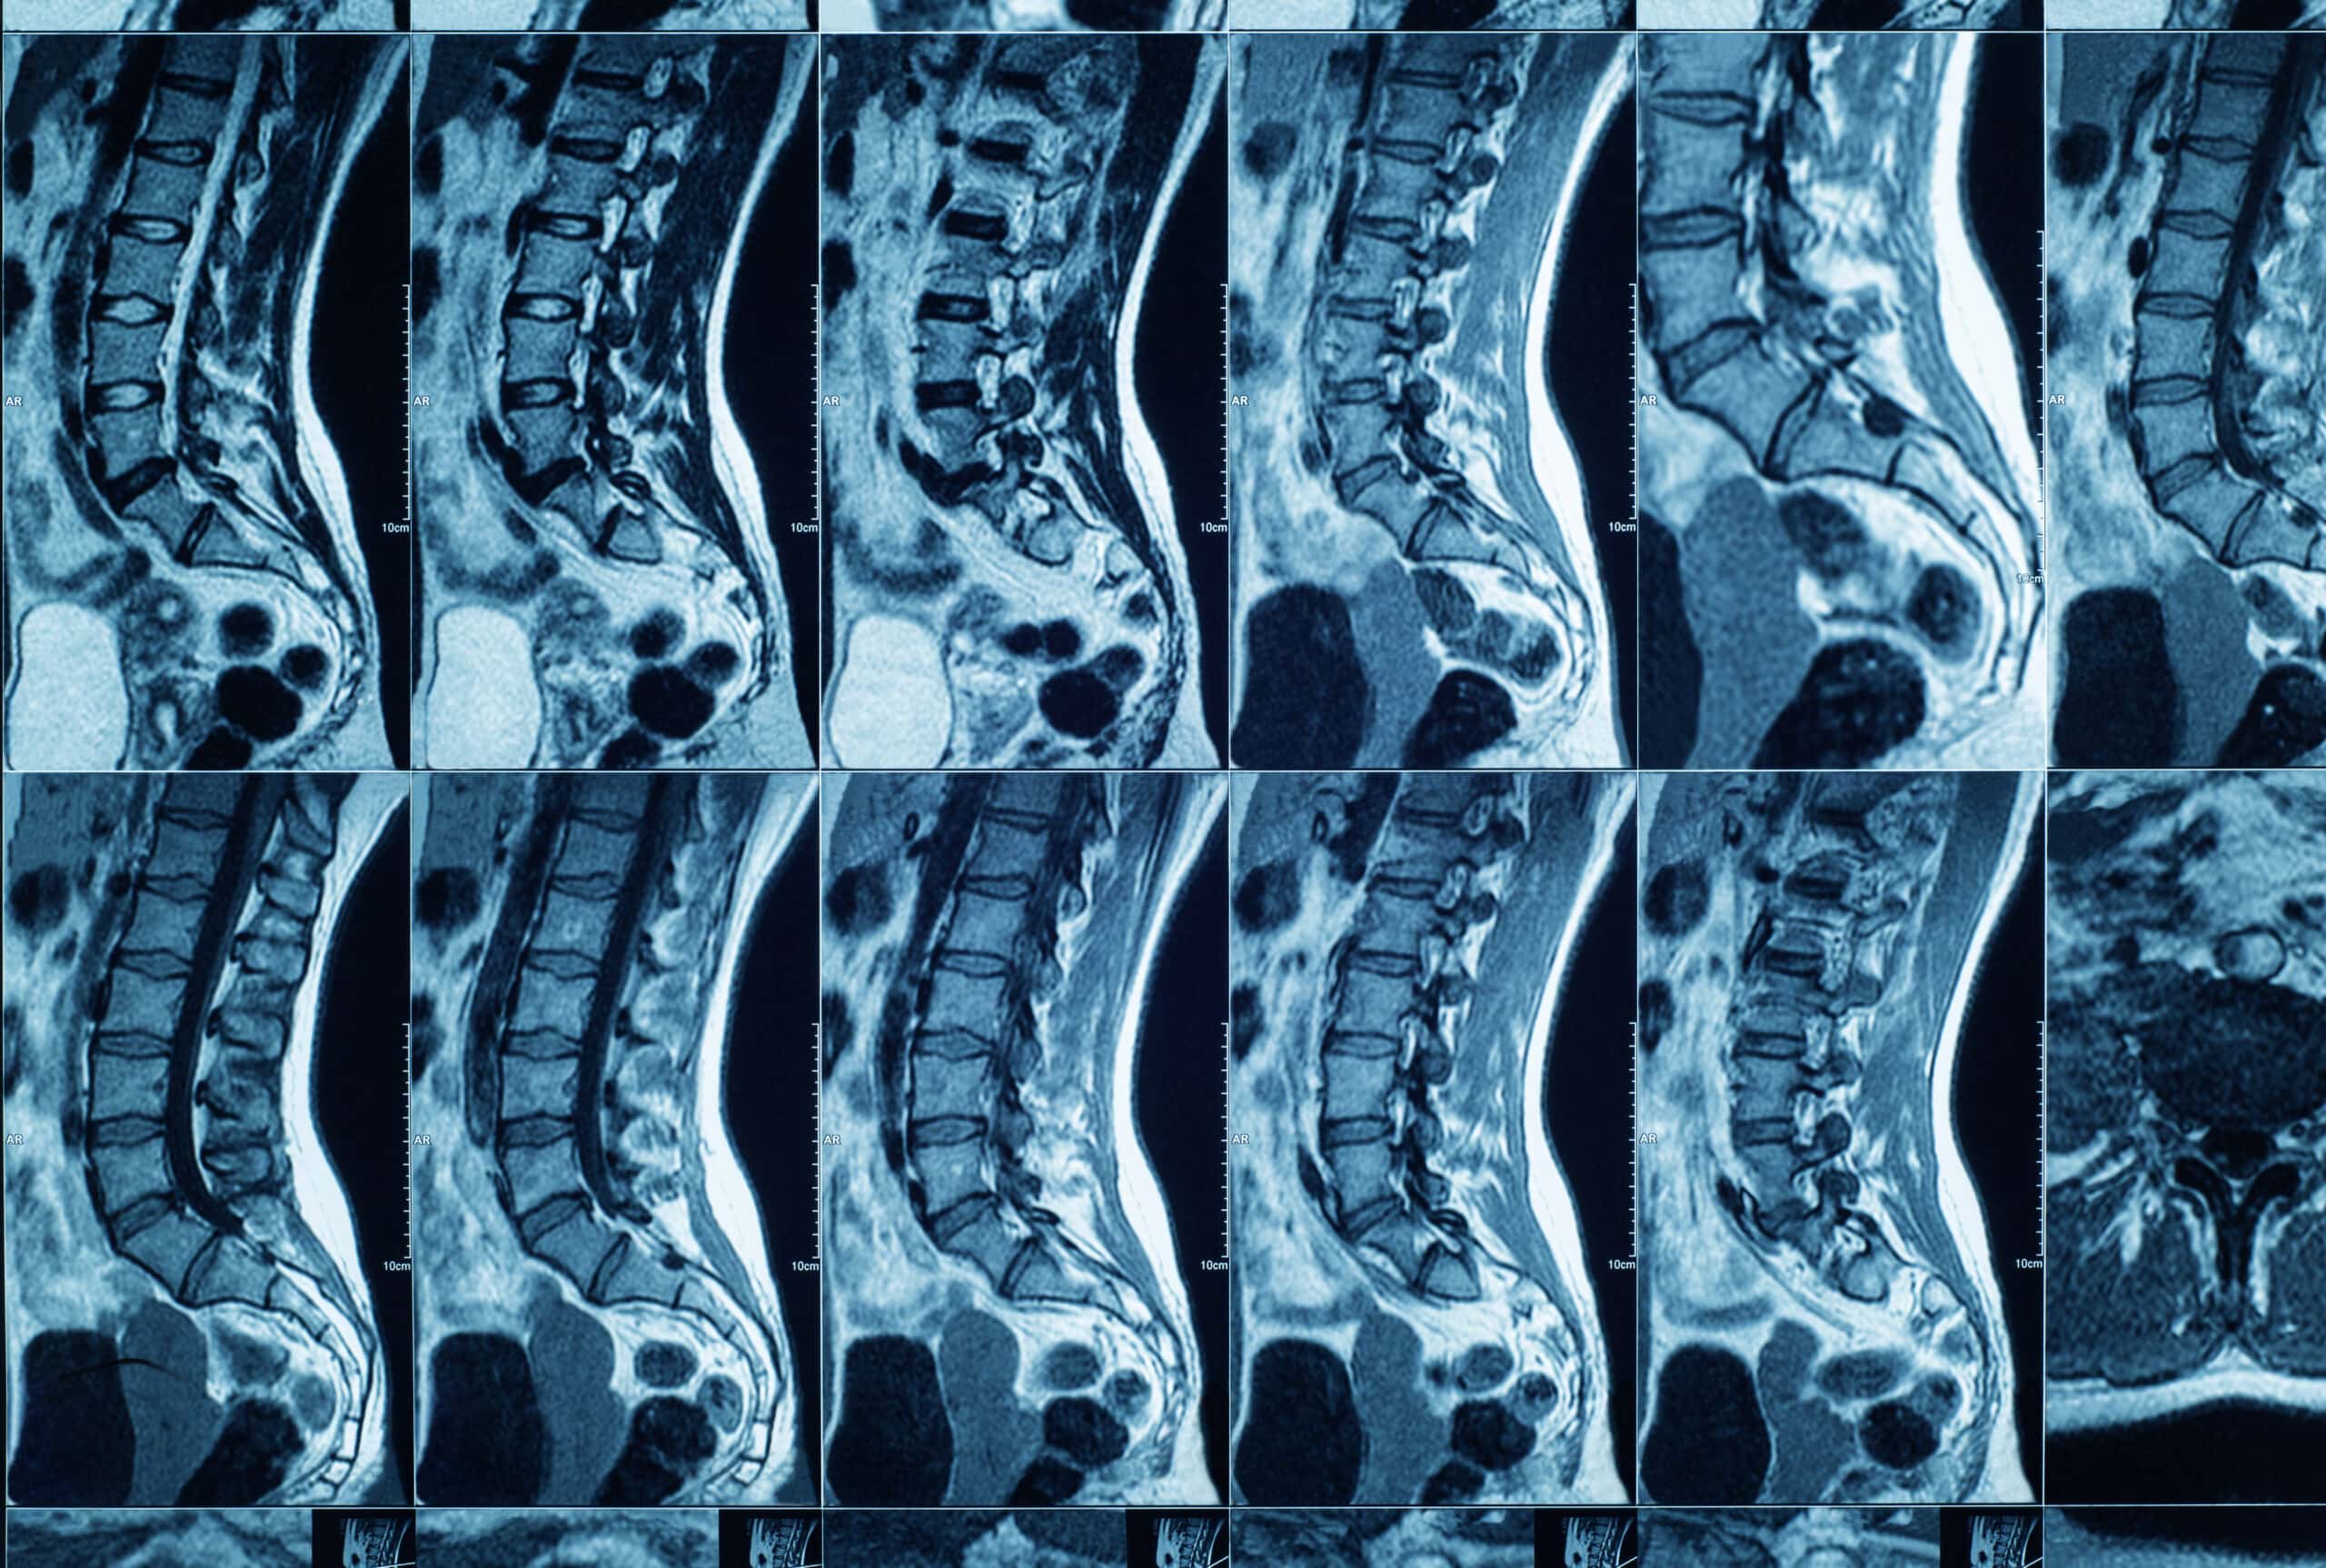
Typical CT resolution is 500 microns in X and Y directions, and 1mm in Z. This is readily handled by Stratasys printers; for example, the print resolution of the J750 Digital Anatomy Printer is 42 microns in X, 84 microns in Y, and 14 to 27 microns layering in Z, which more than captures all possible scanned features.
Computed Tomography Angiography (CTA) involves the same equipment but uses a contrast agent. With this approach, brighter regions highlight areas with blood flow. This process is superior for showing blood vessels but does not differentiate tissue or bones well.
MRI data is based on a different technology where a strong magnetic field interacts with water in the body. This approach differentiates soft tissue and shows small blood vessels but is more expensive and not effective for capturing bone. Similarly, Magnetic Resonant Angiography (MRA) uses a contrast agent that can track small blood vessels which are important for identifying a stroke but cannot register tissue. MRI scans may also include distracting artifacts and offer poor regional contrast.
A final source of digital imaging data is Positron Emission Tomography (PET). Here, radioactive material is attached to a biologically active area such as cancer; the data obtained with sensors is useful but very local – it does not show surrounding tissue.
Segmentation: Conversion from DICOM to STL format
Whether generated by CT or MRI equipment, anatomic image data is stored in digital files in accordance with the Digital Imaging and Communications in Medicine (DICOM) standard. Two aspects of this standard are relevant to 3D printing medical models: DICOM files include patient-specific, HIPPA-protected information, and the data in the individual images must be merged and converted into a solid model, with the areas of interest defined and partitioned.
Various software packages and services are available that will convert DICOM data into an STL model file (standard format for 3D printer input) while stripping out the personal identifying information. (The latter must be done to comply with HIPPA regulations: never send a DICOM file directly to any service bureau.)
Segmentation involves partitioning a digital image into distinct sets of pixels, defining regions as organ, bone, blood vessel, tumor, etc., then grouping and combining those sub-sections into a 3D model saved as an STL file. Not only does this format offer more meaningful information than a stack of separate images, but it can then be exported for 3D printing.
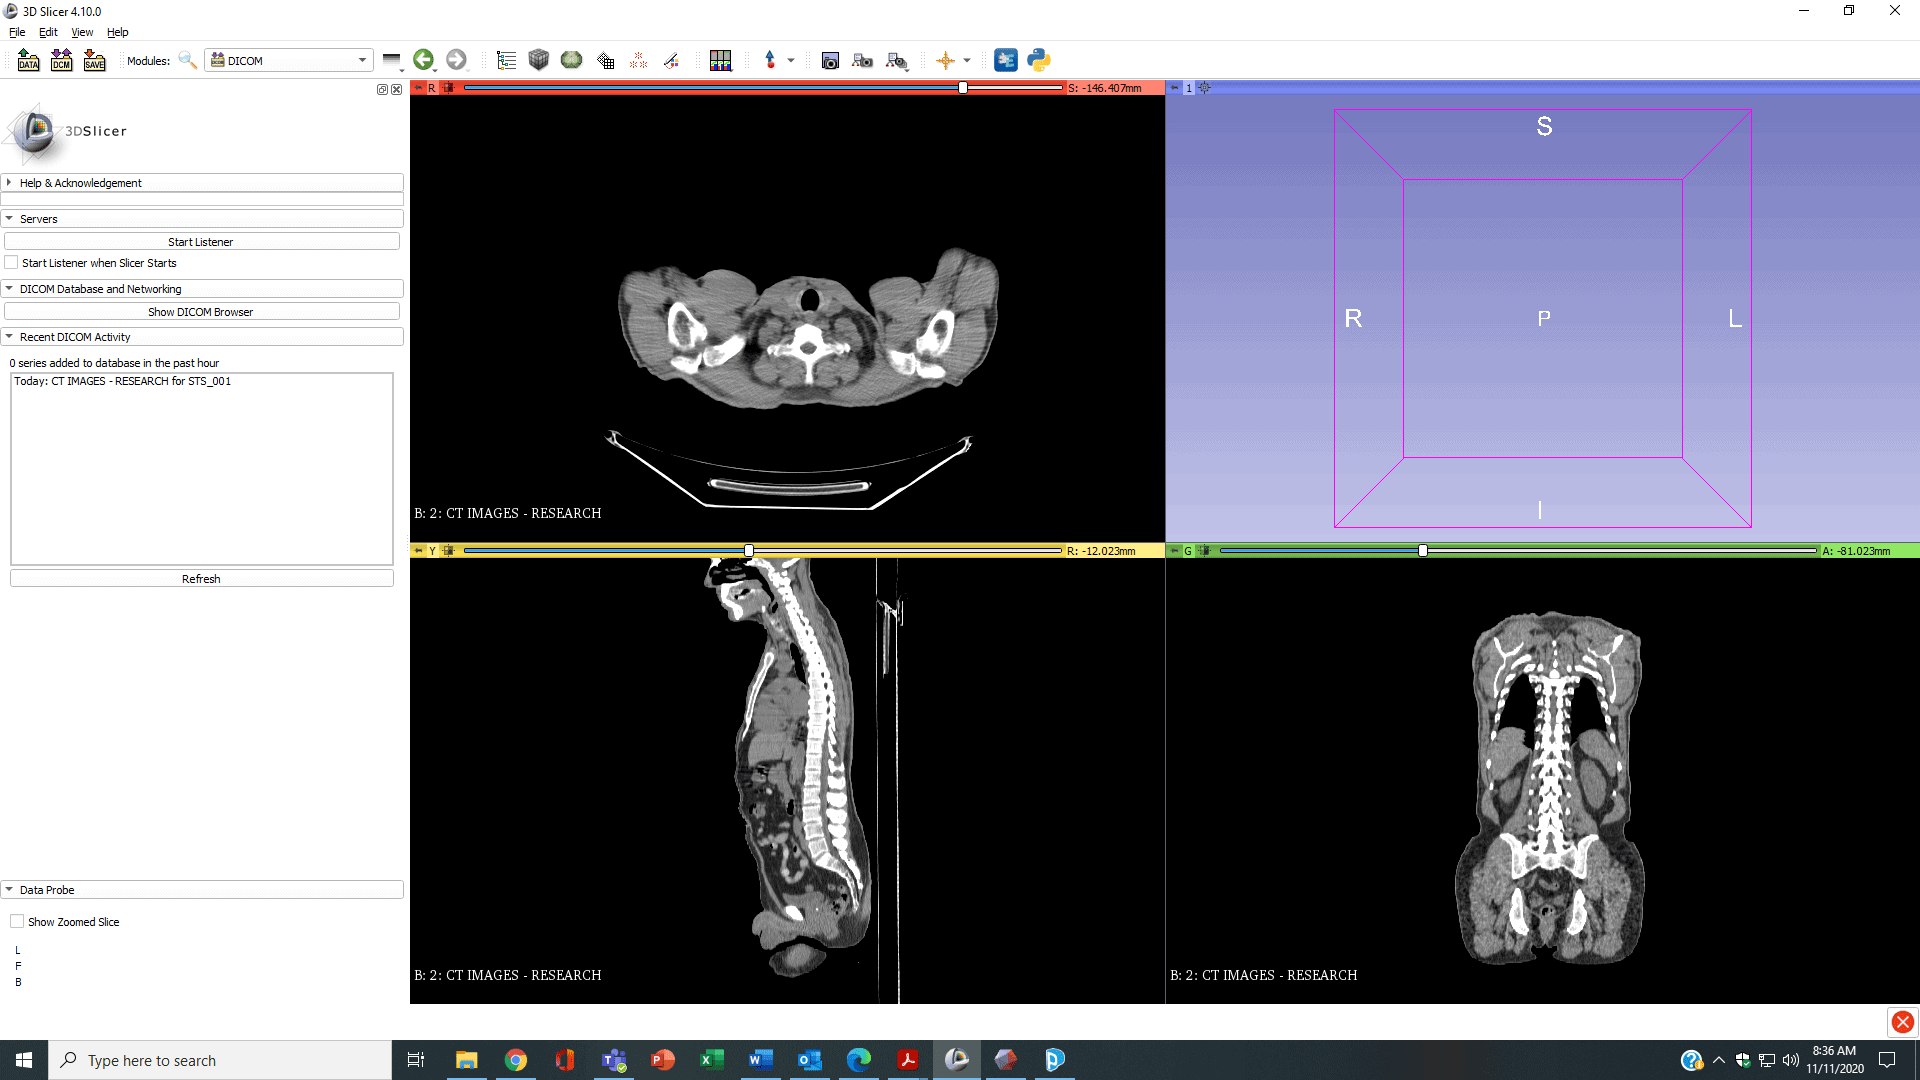
The standard unit of measure for identifying and segmenting the different regions within the combined 3D series of CT scans is a Hounsfield unit. This is a dimensionless value, defined as tissue density/x-ray absorption; for reference, water = zero, a kidney =+40 and bone = +1000.
Human guidance is needed to set threshold Hounsfield levels and draw a perimeter to the area of interest. You can define groups with the same threshold level, cut out certain areas that are not needed (e.g., “mask” the lungs to focus on the spine), and use preset values that exist for common model types. Typically, a radiologist or trained biomedical engineer performs this task, since correctly identifying boundaries is a non-trivial judgement task.
A particularly challenging task is the workflow for printing blood vessels, as opposed to bones or organs. The output from CTA/MRA imaging is the blood pool, not the enclosing vessel. In this case, users need third-party software to create a shell of X thickness around the blood pool shape, then keep both model files (pool and vessel) to guide printing the vessel walls and their internal support structure (which, on the Stratasys J750 Digital Anatomy Printer, is soluble and dissolves out.)
So far, just a few medical segmentation software packages exist:
- Materialise Mimics Innovation Suite is internationally known for its excellence in image analysis and allows you to write scripted routines for automating repeated aspects of the segmentation tasks. There are also tools for interpreting images with metal artifacts, designing support connections between parts, measuring specified features, and rendering a view of the resulting 3D model.
- Synopsys Simpleware ScanIP is a 3D image segmentation, processing, and meshing platform that processes data from MRI, CT, and non-medical imaging systems. Simpleware ScanIP removes or reduces unwanted noise in the greyscale images, allows cropping to the area of interest, supports both automated and user-guided segmentation and measuring and includes API scripting. Modules are available for Cardio, Ortho, and Custom solutions.
- Invesalius 3 is open-source software that can reconstruct CT and MRI data, producing 3D visualizations, image segmentation, and image measurements in both manual and semi-automated modes.
- Embodi3D/Democratiz3D is an online service that lets you upload a series of CT scans, select a basic anatomy type (bone, detailed bone, dental, muscle, etc.), choose the free medium-to-low resolution or paid high resolution conversion service, and receive the link to an automatically generated STL file. (Users do not interact with the file to choose any masking, measuring, or cropping.) The website also offers downloadable 3D printable models and 3D printing services.
Note that these packages may or may not have some level of 510K FDA clearance for how the results of their processing can be used. Users would have to contact the vendors to learn the current status.
Setting up the STL file for printing
Most of the segmentation software packages give you options for selected resolution of the final model. As with all STL files, the greater the number of triangles, the finer the detail that is featured, but the model size may get too large for reasonable set-up in the printer’s software. You may also find that you still want to edit the model, either to do some hole repairs or smoothing, slice away a section to expose an interior view, or add mechanical struts/supports for delicate and/or heavy anatomy sections. Materialise Magics software will do all of this readily, otherwise, adding a package that can edit STL files or create/merge geometry onto an STL file will be useful.

Whoever is setting the file up for printing needs to make a number of decisions based on experience. For Stratasys Connex3, J55, J8-series or J750 Digital Anatomy Printers, the process begins by bringing the file into GrabCAD Print and deciding on an optimized build orientation. Next, colors and materials are assigned, including transparent sections, percentages of transparent colors, and flexible/variable durometer materials, which can be for a single part or a multi-body model.
For the J750 Digital Anatomy Printer in particular, users can assign musculoskeletal, heart, vascular, and general anatomies to each model, then choose detailed, pre-assigned materials and properties to print models whose tactile response mimics actual biomechanical behavior, such as “osteoporotic bone.” (see Sidebar).
I tested out the free online Democratiz3D segmentation service offered by Embodi3D. (Note, you need to create a free account to try the tool) Following their tutorial, I was able to convert my very own DICOM file folder of 267 CT images into files without patient ID information, generating a single STL output file. I chose the Bone/Detailed/Medium resolution option which ignored all the other visible anatomy then brought the resulting model into the free software Meshmixer to edit (crop) the STL. That let me zero in on a three-vertebrae section of my lower spine model and save it in the 3MF format.
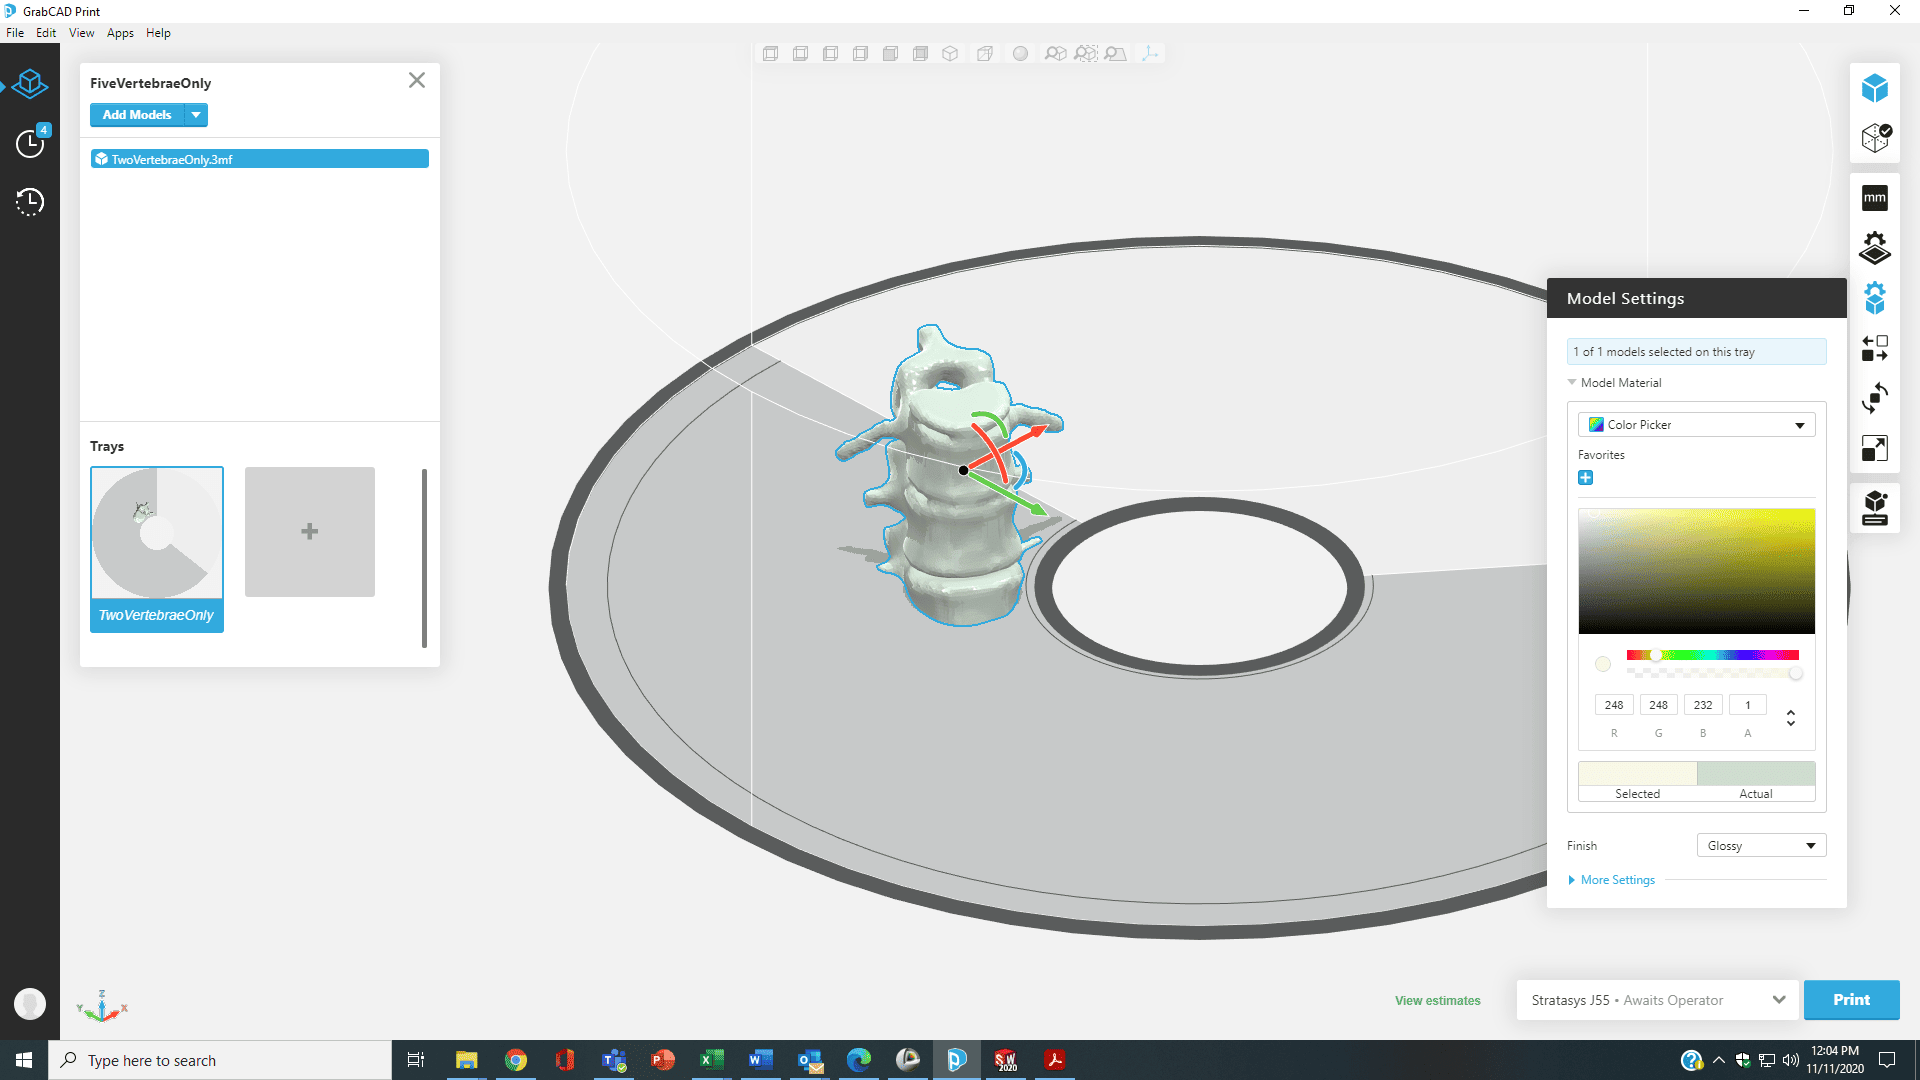
Lastly, I opened the new 3MF file in GrabCAD Print, the versatile Stratasys printer set-up software that works with both FDM (filament) and PolyJet (UV-cured resin) printers. For the former case, I printed the model in ivory ASA on an F370 FDM printer, and for the latter, I was able to assign a creamy-grey color (Red248/Green248/Blue232) to give a bone-like appearance, printing the model on a J55 PolyJet office-environment printer.
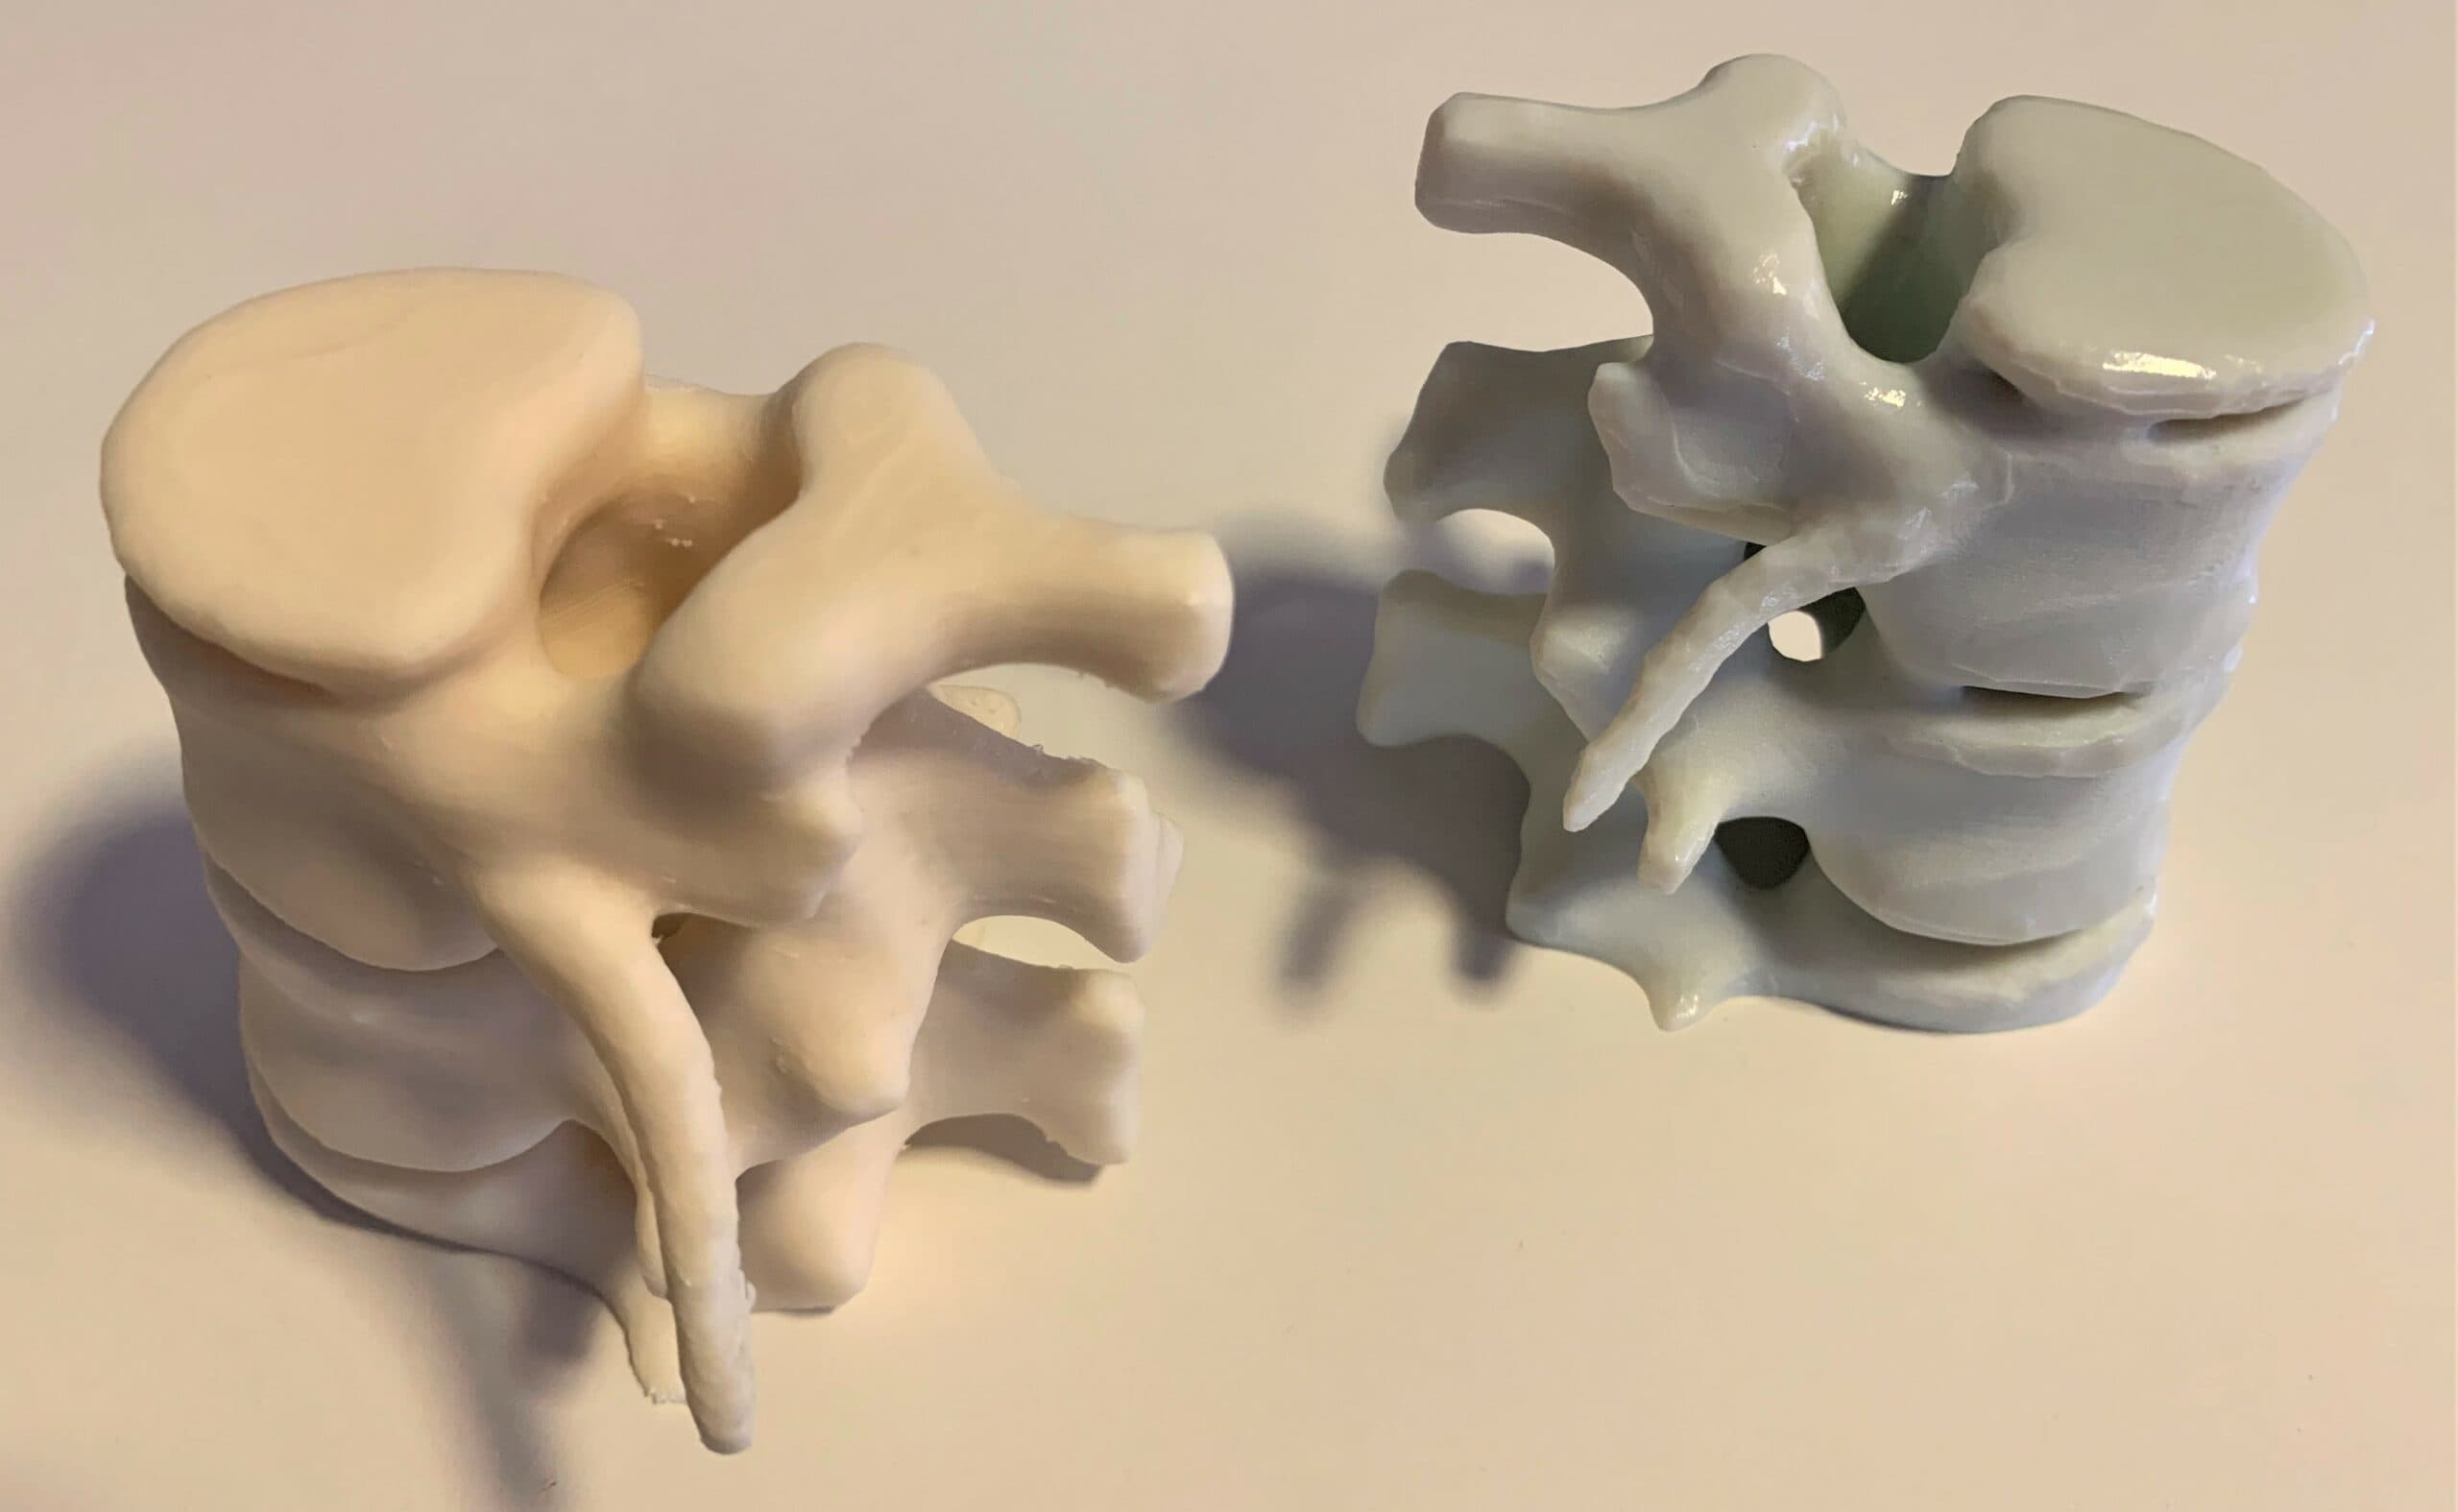
Experience helps in producing accurately segmented parts, but more features, such as AI-enabled selections, and more online tutorials are helping grow the field of skilled image-processing health professionals. Clarkson College (Omaha, NE) also recently announced the first Medical 3D Printing Specialist Certificate program.
Reach out to PADT to learn more about medical modeling and Stratasys 3D printers.
PADT Inc. is a globally recognized provider of Numerical Simulation, Product Development and 3D Printing products and services. For more information on Stratasys printers and materials, contact us at info@padtinc.com.
—————————
Sidebar: J750 Digital Anatomy Printer
The Stratasys J750 Digital Anatomy Printer uses PolyJet resin 3D printing technology to create parts that mimic the look and biomechanical response of human tissue, organs and bones. Users select from a series of pre-programmed anatomies then the material composition is automatically generated along with accurate internal structures. Pliable heart regions allow practice with cutting, suturing and patching, while hollow vascular models support training with guide wires and catheters. General anatomy models can replicate encapsulated and non-encapsulated tumors, while bone structures can be created that are osteoporotic and/or include regions that support tapping, reaming and screw insertion.
Currently the Digital Anatomy Printer models present in the range of 80 to 110 Hounsfield Units. Higher value materials are under development which would help hospitals create phantoms for calibrating their CT systems.
Currently available Digital Anatomy Printer Model/Section Assignments:
Structural Heart:
- Clot
- Frame
- Myocardium
- Reinforcement
- Solid Tumor
- Valve Annulus
- Valve Chordae
- Valve Leaflet
- Valvular Calcification
- Vessel Wall
General Anatomy:
- Dense connective tissues
- Hollow internal organs
- Solid internal organs
- Solid Tumor
Blood Vessels:
- Clot
- Fixtures
- Frame
- Gel Support
- Inlets
- Reinforcements
- Solid Tumor
- Valve Annulus
- Valve Leaflet
- Vascular Calcification
- Vessel Wall
Musculoskeletal
- Facet Joints
- General Bone
- Intervertebral Discs
- Ligament
- Long Bone
- Nerves
- Open End
- Ribs
- Skull
- Vertebra

