
Cloud computing is becoming more and more popular with the recent changes in the work environment, and Ansys Cloud solution is no exception. While running a Fluent simulation on the Ansys Cloud is now a more familiar task among CFD users since its introduction around a year ago, there are still some cases that might be challenging and need more attention. One of these cases is performing a Fluent simulation using a UDF.
The first thing users might notice when launching an Ansys Cloud Fluent job through the ACT extension is that the UDF files won’t be uploaded, which is why they might see their cases are failing if they don’t pay extra attention. In order to avoid this issue, users must follow one of the options below.
The first and most commonly used method to launch a Fluent job with a UDF is via the CLI (Command Line Interface). With this method, the .c and all other files in the working directory will be uploaded to the Cloud. Then UDF will then be compiled on the Cloud.
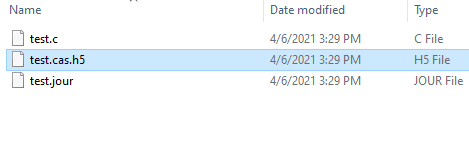
Since the Cloud computers already have compilers installed, one doesn’t need to anything special. The local directory should have .c file, case file with UDF plugged-in, and a journal file. As a side note, Ansys Fluent 19.3 and higher supports expressions that can be used to define boundary conditions instead of UDF. Starting with Ansys Fluent 2020R2, the C compiler is built-in with the software. Please refer to the product documentation.
We highly recommend that the user should have the required compiler installed locally to compile, hook, and test the routine before submitting it to the cloud.

If you have not used CLI to submit a Fluent job to the clouds, please read the article below:
https://cloudforum.ansys.com/t/80njy9/how-to-running-fluent-on-cloud-using-a-journal-file-and-udf
In short, you have to open a command prompt (cmd.exe) and navigate to your working folder. This folder should contain all the Fluent input files needed for the run: journal file, case file, etc. Once you login using ansyscloudcli command, you are ready to submit your job on the cloud.
Below is a common example for the commands to run Fluent on the cloud:
ansyscloudcli runfluent -j fluent_via_journal --jou tjunction.jou –q Flexible_eastus_Standard_HC44rs_2020r2 -n 1 -m 36 -v 2020r2
Here is some description of these commands:
> AnsysCloudCLI runFluent -j <job name> [--jou <journal>] -q <queue>  [-n <num nodes>] [-m <max cores>] -v <solver version>
-j: job name
-q: name of the queue
    (run: ansyscloudcli getQueues, to get a list of all queues. Queue name is case sensitive)
-i: name of the input file for the solver
--jou: journal to execute (if set, -i is not used)
-n: number of nodes
-m: (optional) max number of cores. Useful if you want to make a run with 4 cores on a computer with 16 cores
-v: target solver version
The second method is to compile the UDF locally and upload all files to a virtual desktop infrastructure (VDI) session. Then the compiled UDF can be used with Fluent through the VDI session. Note that the UDF can’t be compiled on a VDI session with versions 2020R2 and earlier.
Lastly, with 2021R1 Fluent has a built in Clang compiler which will allow you to compile a UDF in a VDI session. However, the Clang compiler still won’t allow you to submit a Fluent job with a UDF through the ACT.

Ansys Cloud VDI solution running on a local desktop via RDP


