Friday Flownex Tech Tips #8
Hi Folks! Another short and simple tech tip this week; How to set up an external shared database in Flownex. When working as part of a team it makes sense to share resources. Once one person builds a custom component or defines a complex fluid we want to share that with everyone in our organization. Today I will show you how to create and maintain a shared database. For todays example we are working in Flownex version 8.12.7.4334
Creating the Database
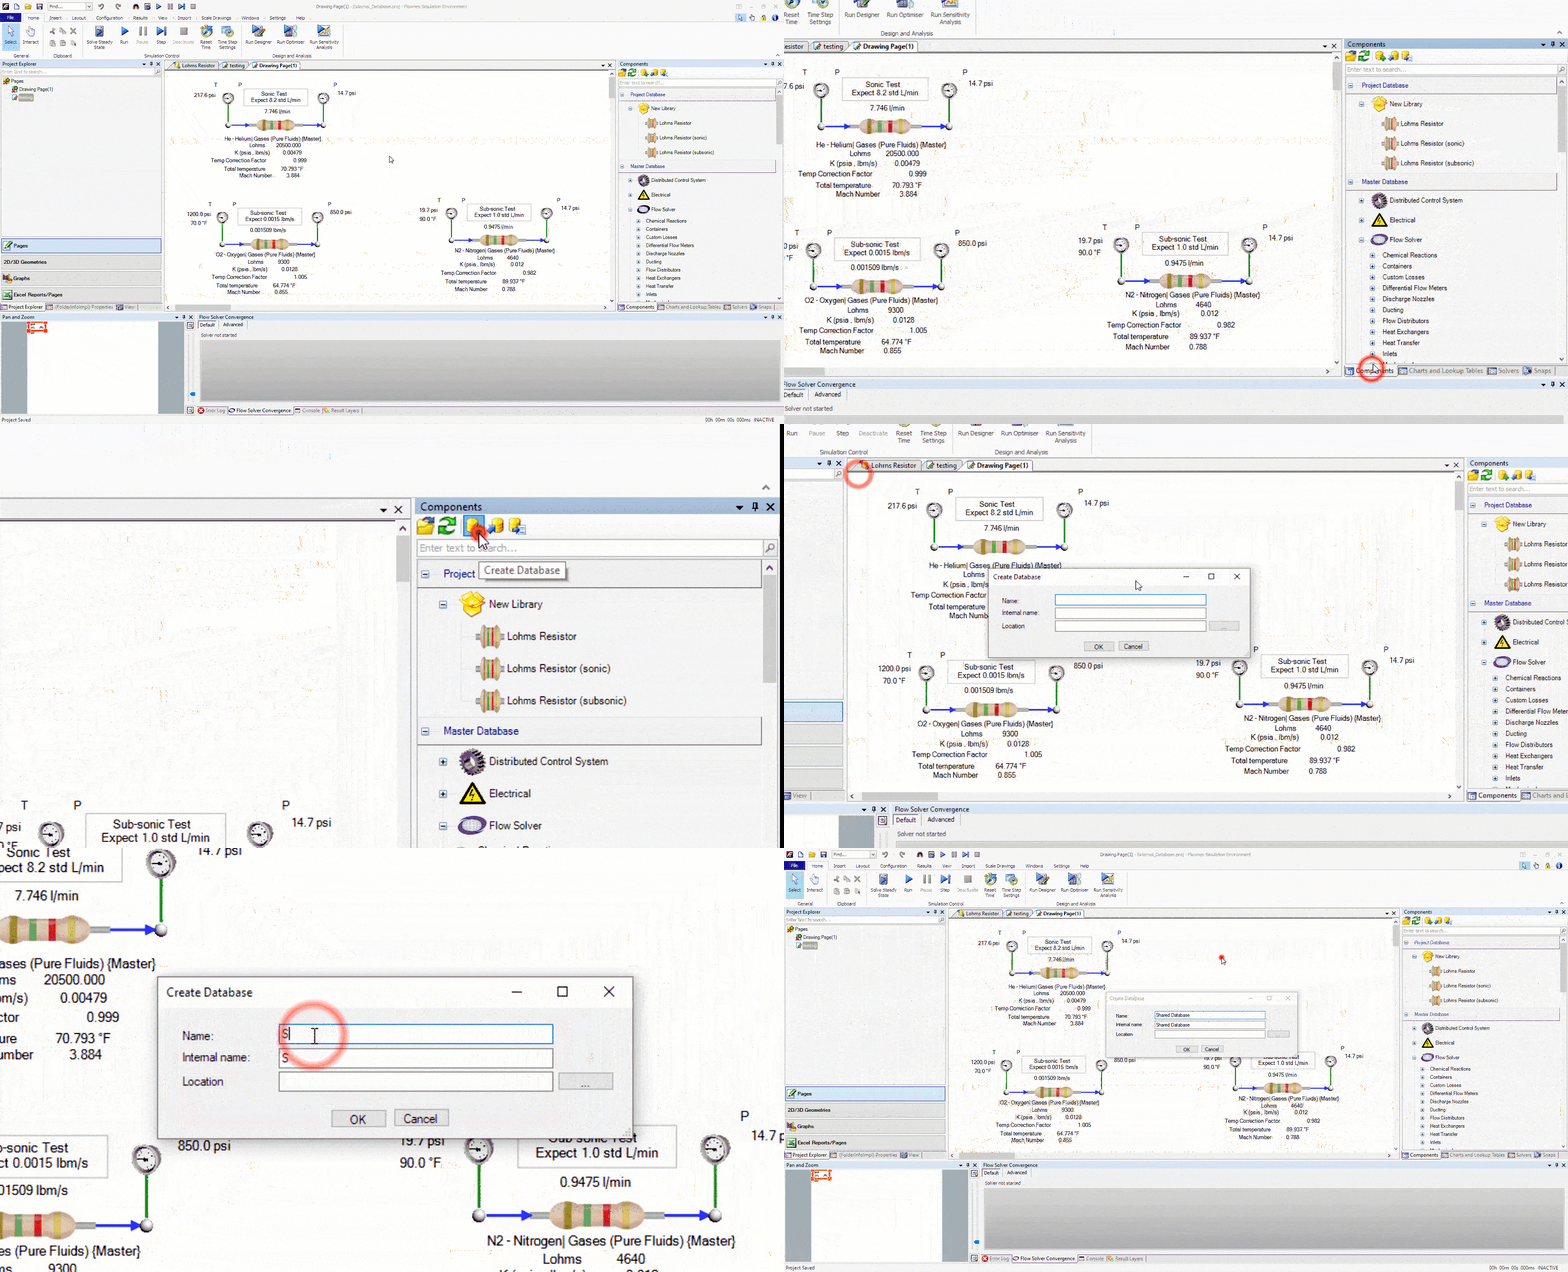
Start by opening up Flownex – it can be a new project or any existing project. On the right side of the GUI we’ll want to navigate to the Components pane. At the top of the pane you’ll see a variety of buttons. Depending on your installation the buttons you see may be different than the ones in the visual below. To create a new database we’ll want to click the Create Database icon.
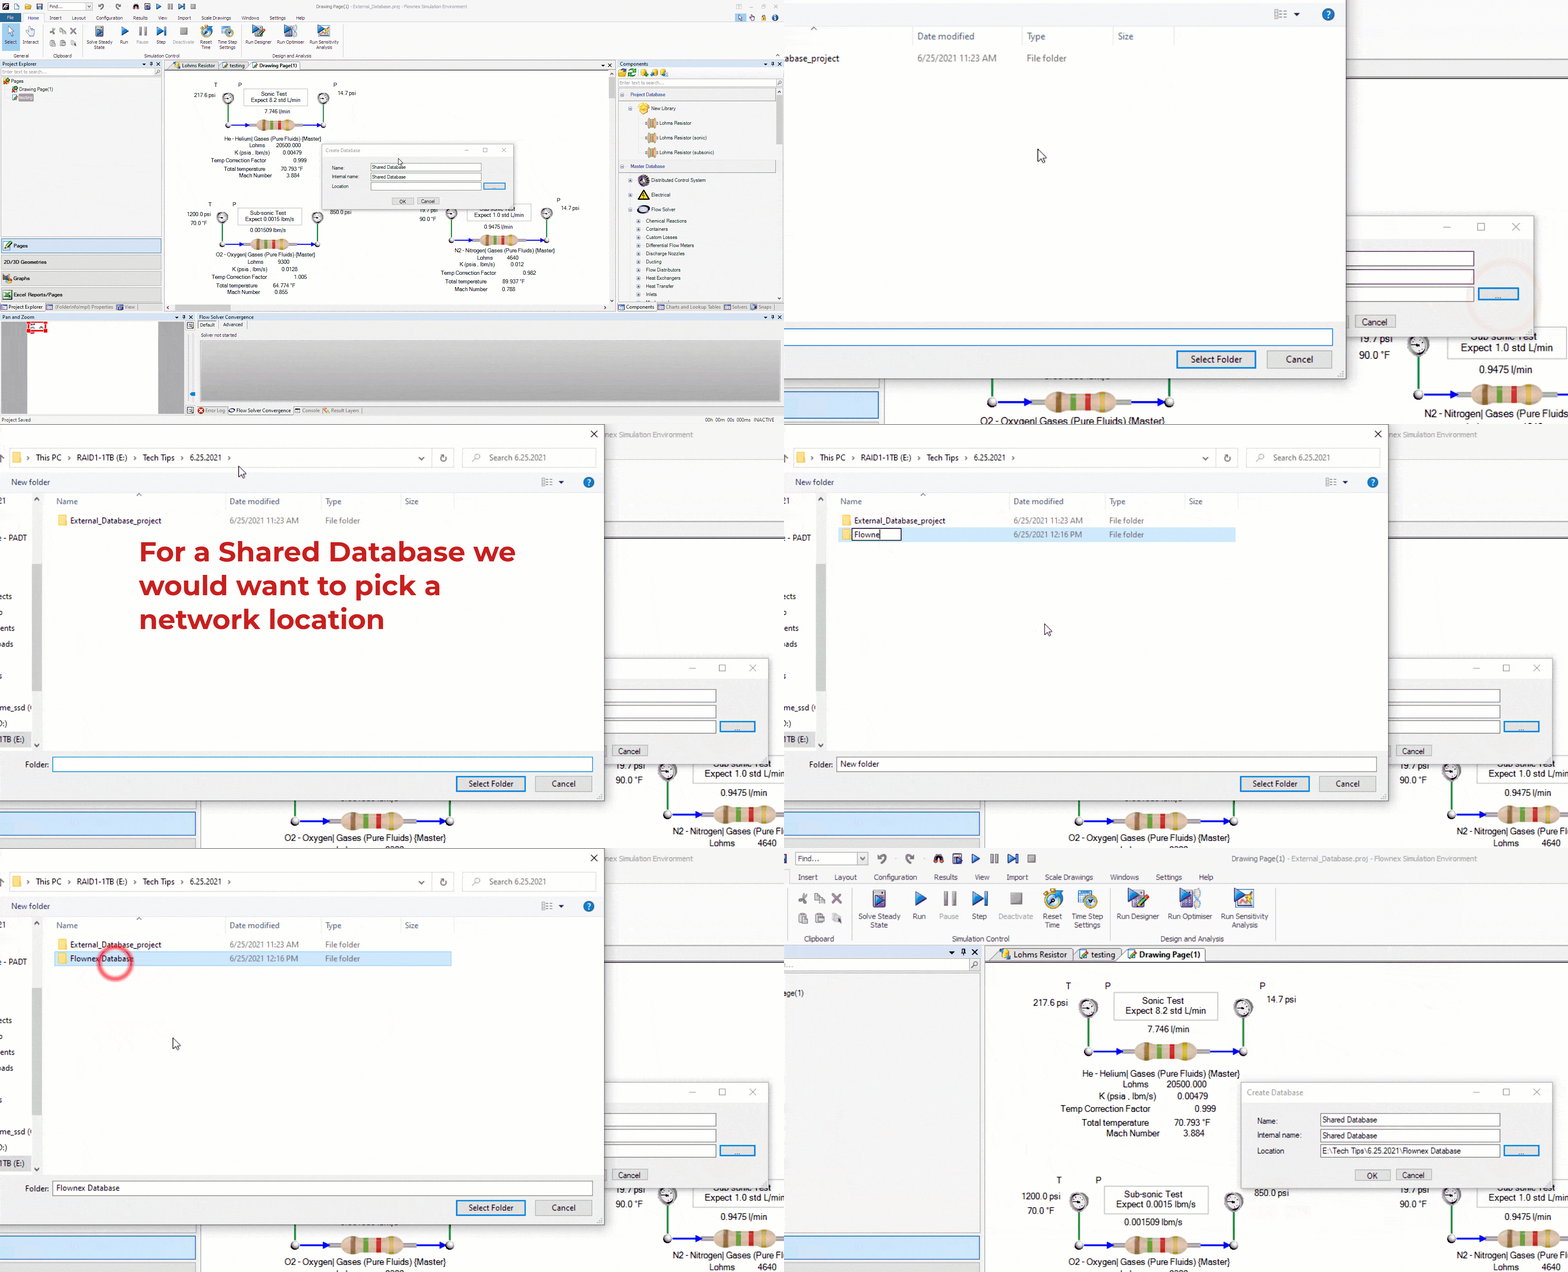
Then we’ll want to navigate to a shared network location and pick an appropriate folder that will be accessible to others in our organization. I would encourage keeping the directory name as short as possible (I.E. a top level location) so that there is no concern for a deep database hitting windows character limit.
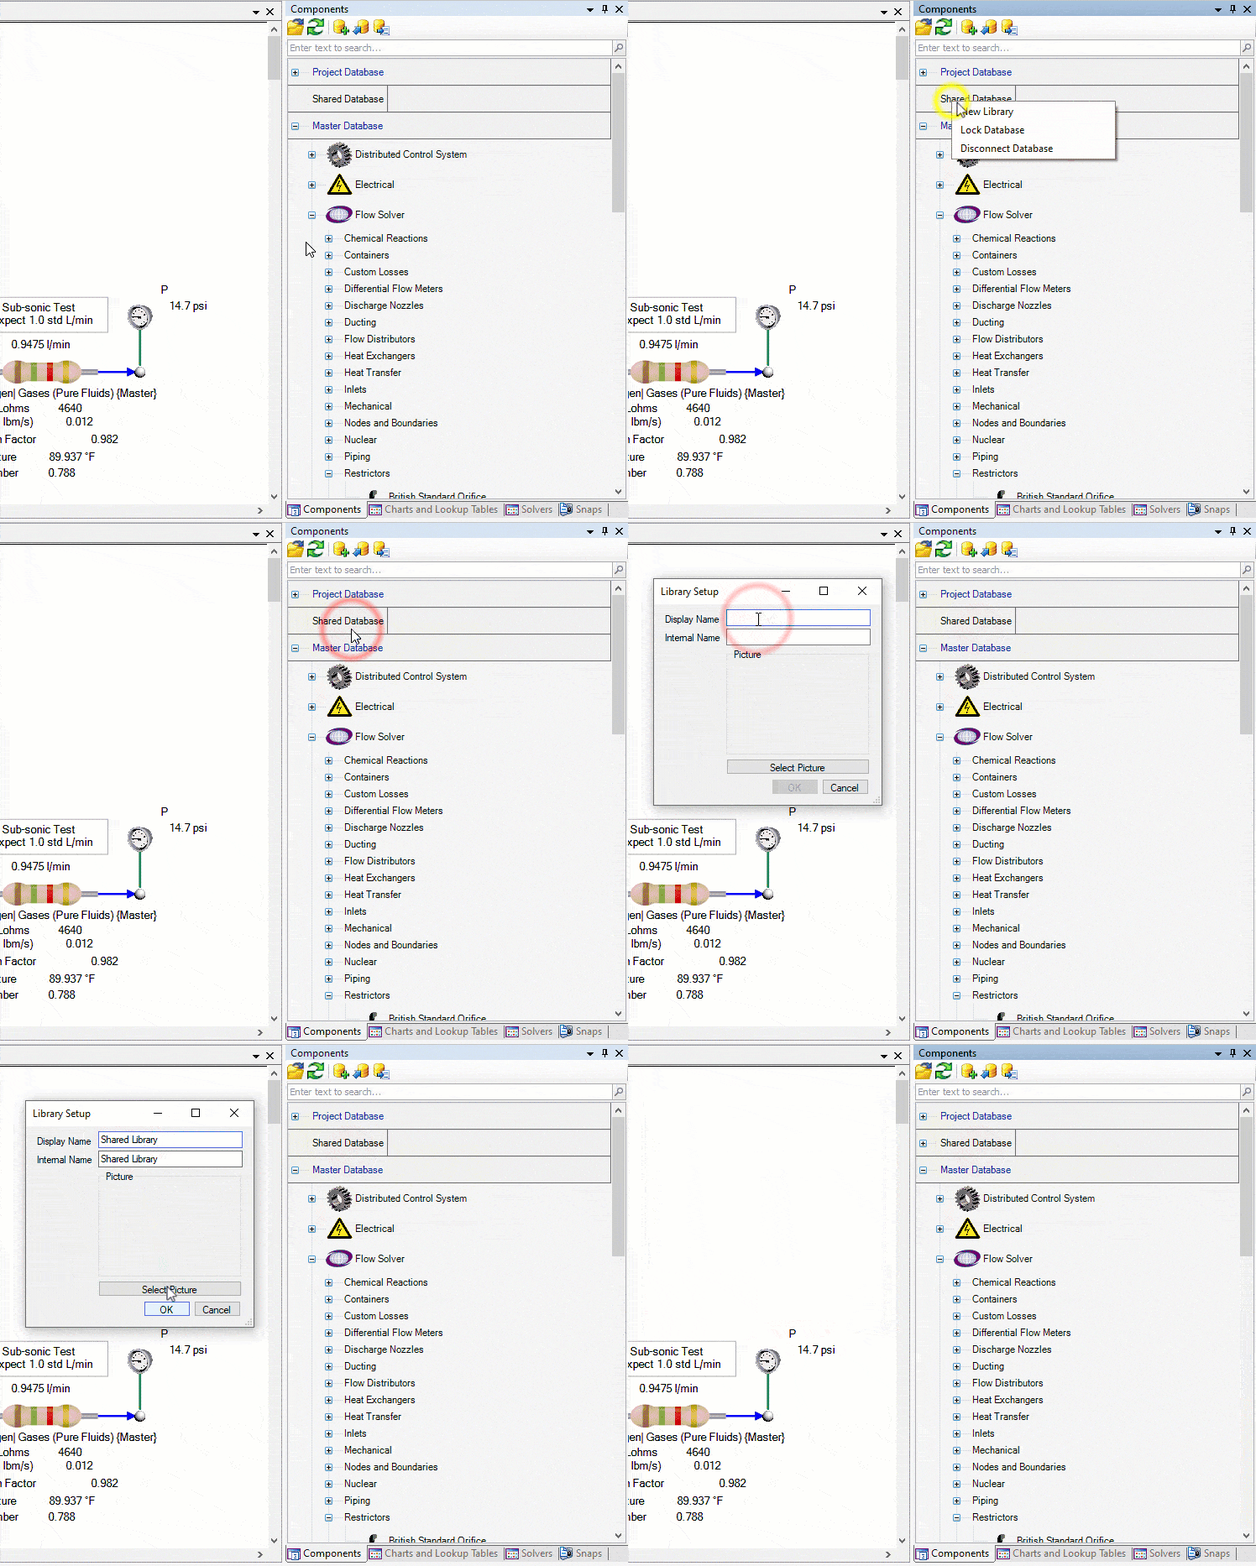
Once we have chosen a location and clicked OK we will see our shared database in both the Components pane and in the Charts and Lookup Tables pane. We’ll need to right-click on the newly created shared database and create a New Library in which we will place our shared components. Creating multiple libraries can be useful when grouping similar components or to discretize between different groups in the organization which are using Flownex.
Adding components to an External Database
To add custom components to our external database we simply drag and drop them from our project database. If you want to learn how to create a custom compound component please reference our previous blog post on this topic here. Choosing “Copy” will create a copy of the component in the shared database, choosing “Move” will move the component to the shared database and any references to that component in the project will now reference the component from the external database.
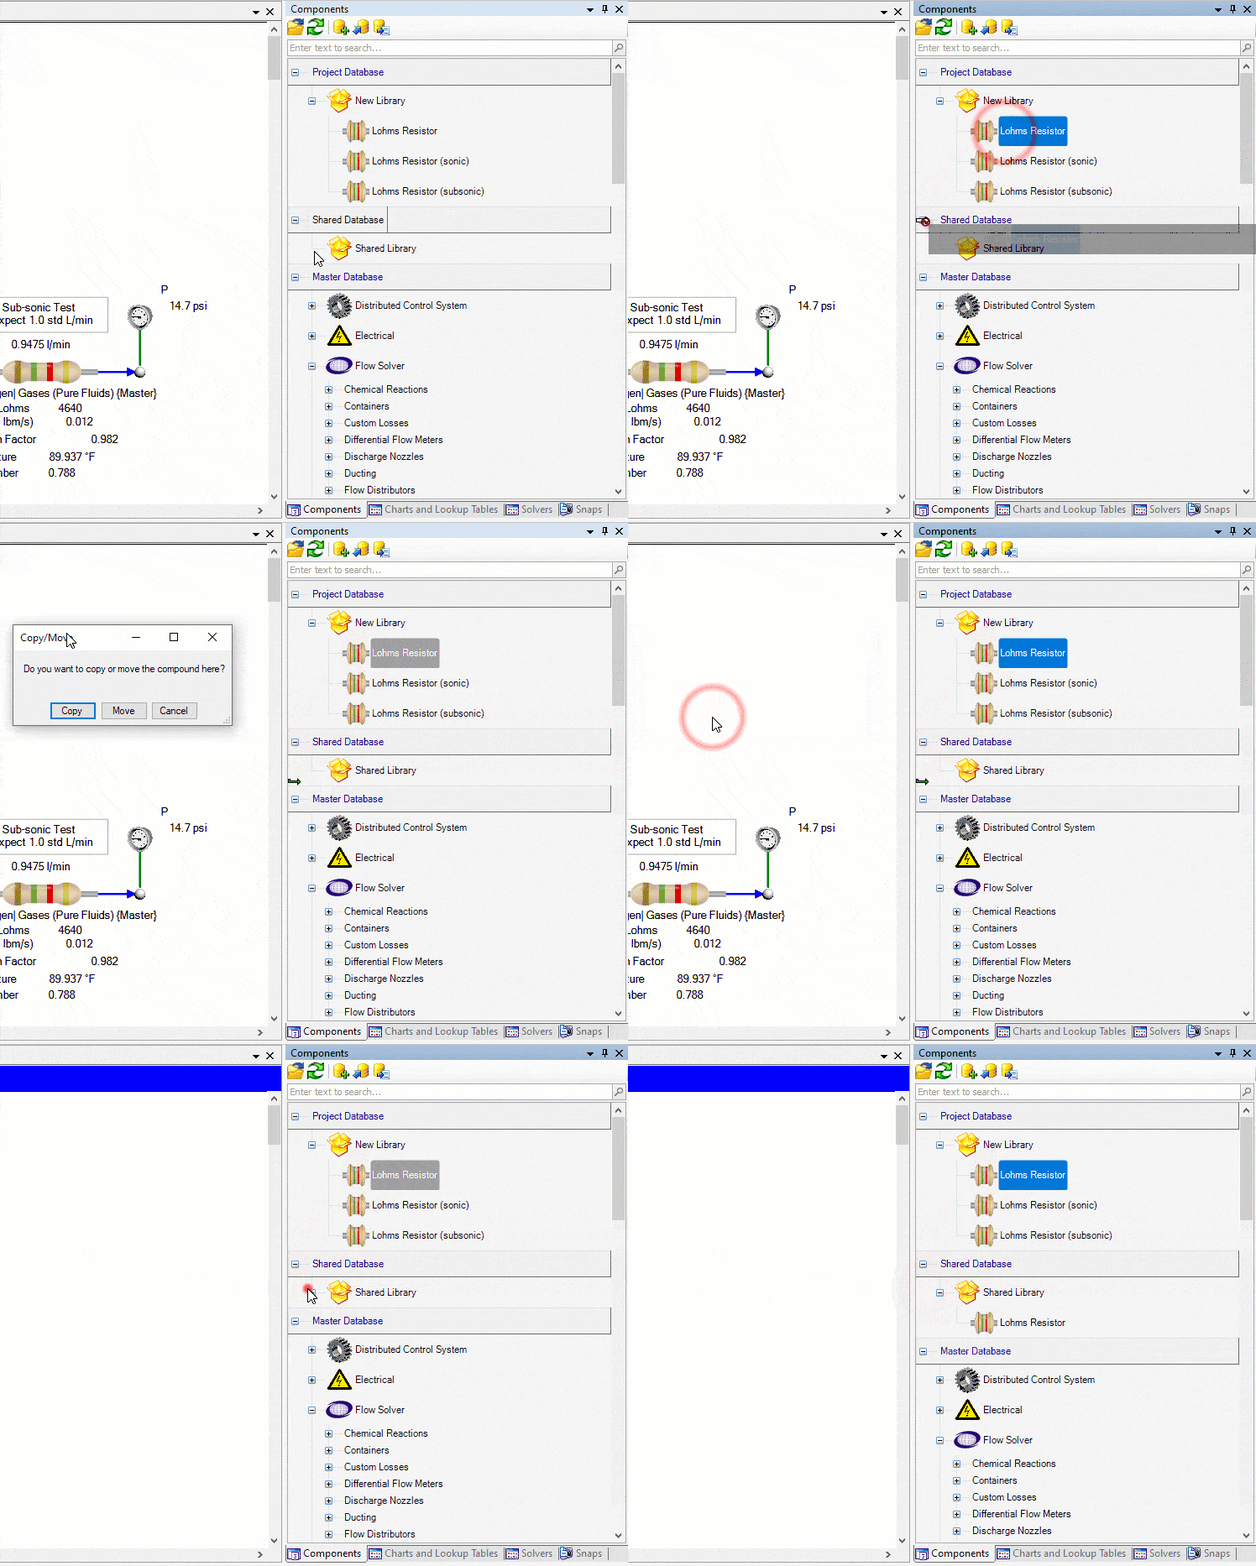
Adding a fluid to an External Database
To add a custom fluid to our external database the process is very similar to the procedure for the custom compound component. The only difference is that we want to do this drag and drop action within the Charts and Lookup Tables pane instead of the Components pane. If you need a refresher on creating or importing custom fluids here is a blog post on that topic!
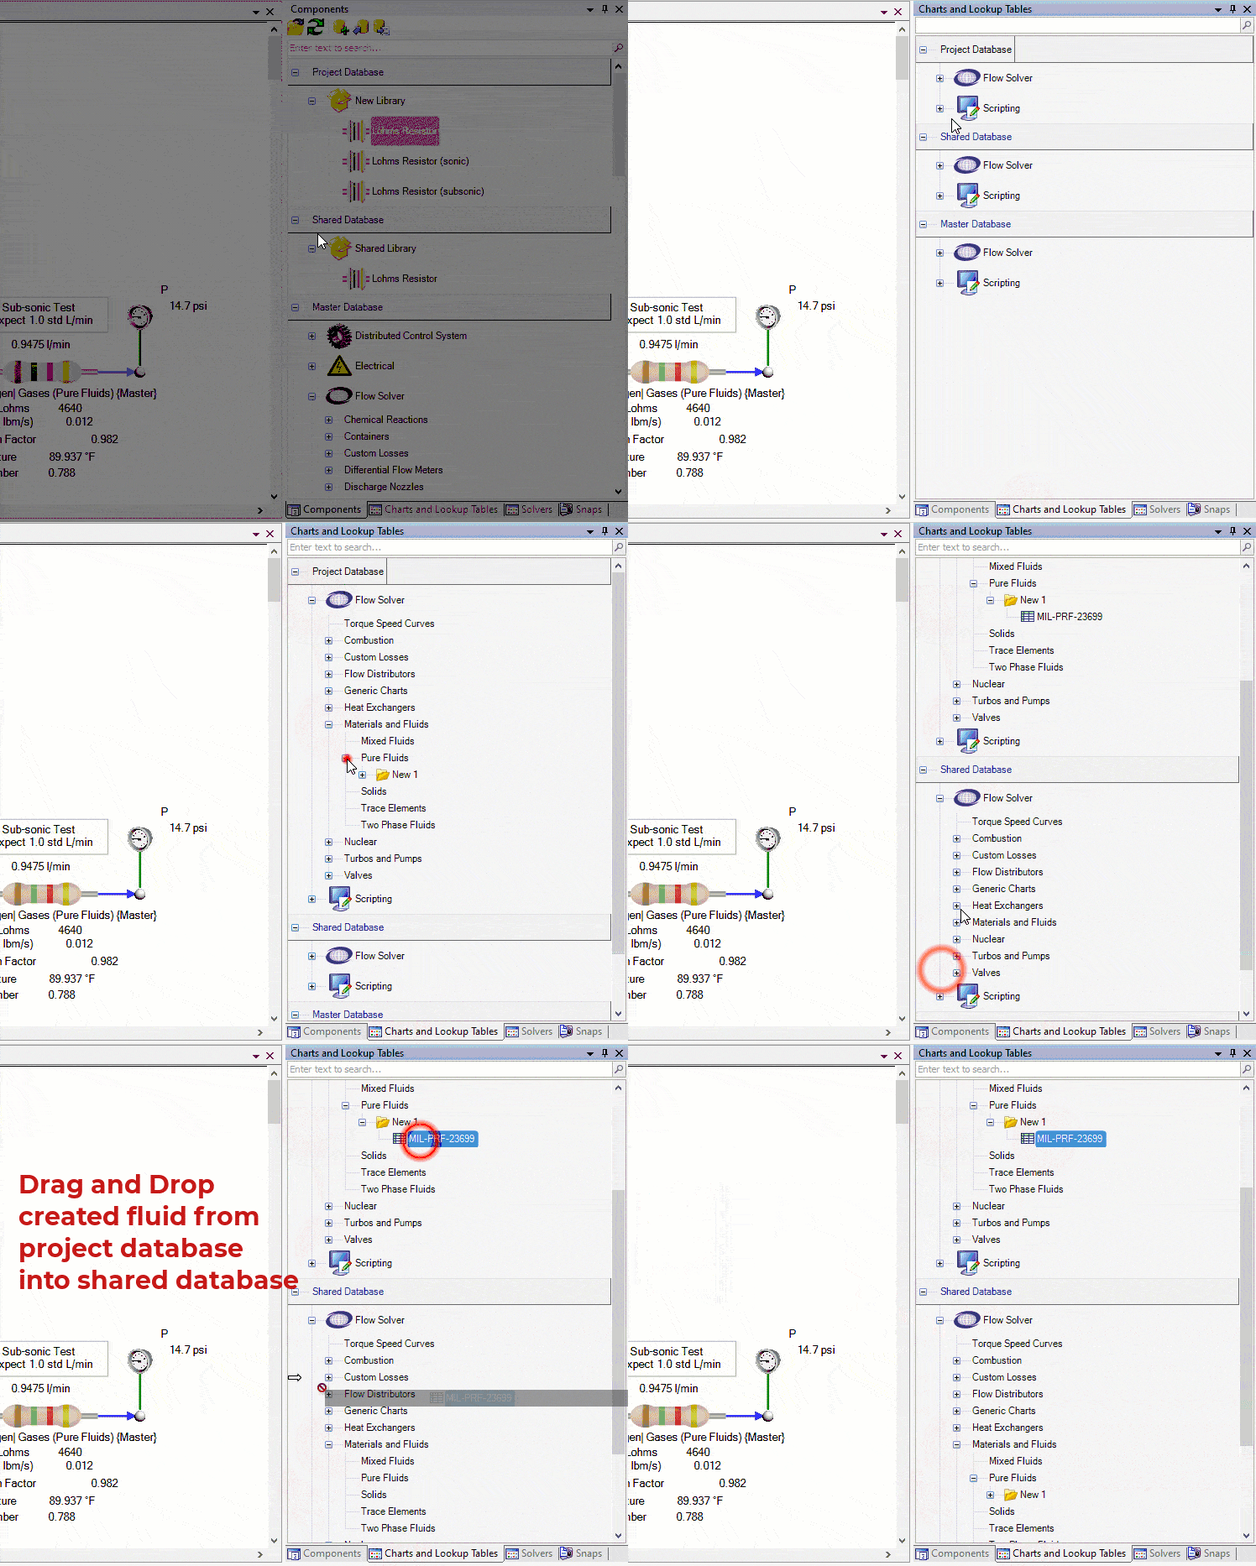
Connecting to an External Database
Once a user has created a shared database it is now possible for other users to connect to that database. the process of connecting to an external database is quite simple. On the Components pane we will again look at the buttons near the top. We will want to click the Connect Database icon and then navigate to the shared location of the external database. Once there we will find the database configuration file, .dbcfg. We should select this file and click OK. You are now connected to the shared database!
Bonus Tips!
- To lock an external database to avoid unintentional editing you can right-click on the database in Flownex and select “Lock Database”.
- If you need to migrate the database to another location on your server you can copy the entirety of the folder and move it. Users will simply need to follow the same procedure of connecting to an external database the next time they open Flownex.
- Special Note: If sending a network to someone external to your organization it is important to note that components or references from external databases will not be included by default. These components or charts will need to be copied to the project database and then the shared database will need to be disconnected before archiving the project for transfer. A second option would be to share the database itself.

