
“How do I turn on HPC to use multiple cores when running an analysis?”
For those that don’t know, ANSYS spends a significant amount of resources into making the various solvers it has utilize multiple CPU processors more efficiently than before. By default, depending on the solver, you are able to use between 1-2 cores without needing HPC licenses.
With the utilization of HPC licenses, users can unlock hyperdrive in ANSYS. If you are equipped with HPC licenses it’s just a matter of where to look for each of the ANSYS products to activate it.
ANSYS Mechanical
Whether or not you are performing a structural, thermal or explicit simulation the process to activate multiple cores is identical.
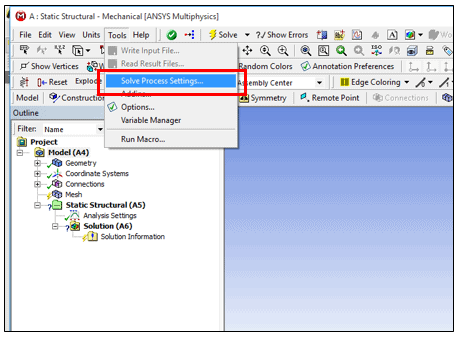
- Go to Tools > Solve Process Settings
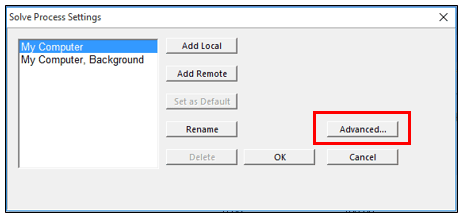
- The Solve Process Settings Window will pop up
- Click on Advanced to open up the Advanced Settings window
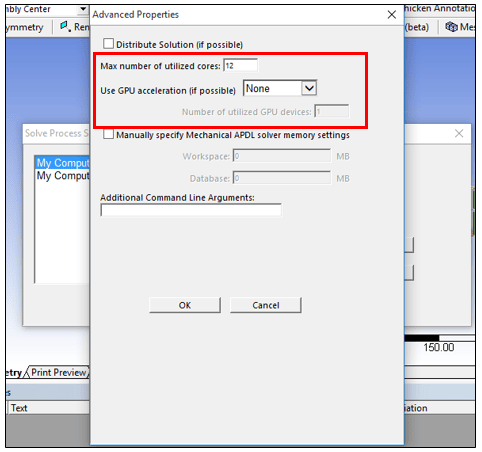
- You will see an option for Max number of utilized cores
- Simply change the value to your desired core count
- You will see below an option to allow for GPU acceleration (if your computer is equipped with the appropriate hardware)
- Select the GPU type from the dropdown and choose how many GPUs you want to utilize
- Click Ok and close
Distributed Solve in ANSYS Mechanical
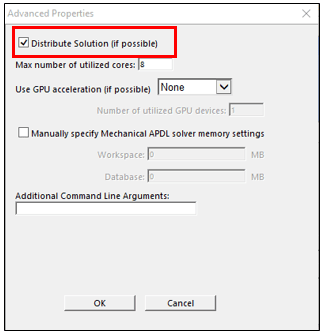
One other thing you’ll notice in the Advanced Settings Window is the option to turn “Distributed” On or Off using the checkbox.
In many cases Distributing a solution can be significantly faster than the opposite (Shared Memory Parallel). It requires that MPI be configured properly (PADT can help guide you through those steps). Please see this article by Eric Miller that references GPU usage and Distributed solve in ANSYS Mechanical
ANSYS Fluent
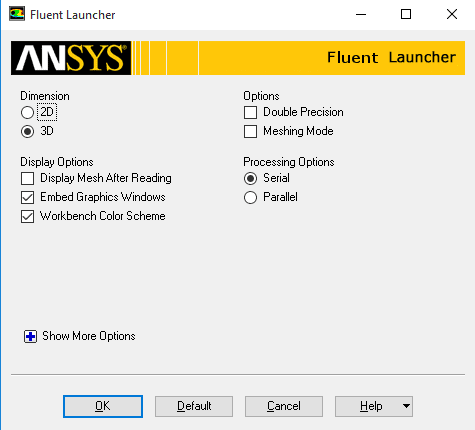
Whether launching Fluent through Workbench or standalone you will first see the Fluent Launcher window. It has several options regarding the project.
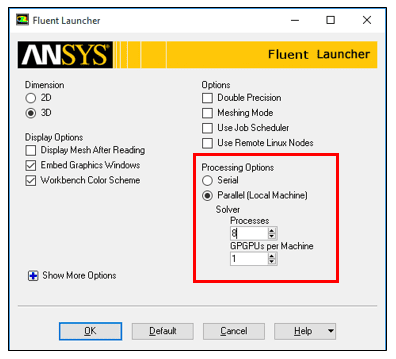
- Under the Processing Options you will see 2 options: Serial and Parallel
- Simply select Parallel and you will see 2 new dropdowns
- The first dropdown lets you select the number of processes (equal to the number of cores) to use in not only during Fluent’s calculations but also during pre-processing as well
ANSYS CFX
For CFX simulations through Workbench, the option to activate HPC exists in the Solution Manager
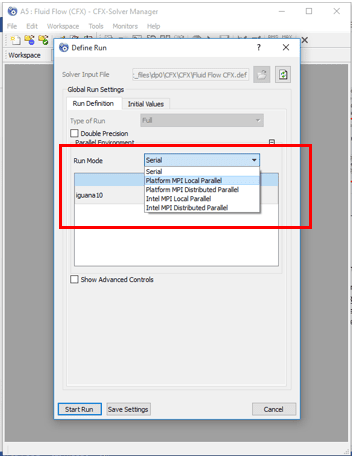
- Open the CFX Solver Manager
- You will see a dropdown for Run Mode
- Rather than the default “Serial” option choose from one of the available “Parallel” options.
- For example, if running on the same machine select Platform MPI Local Parallel
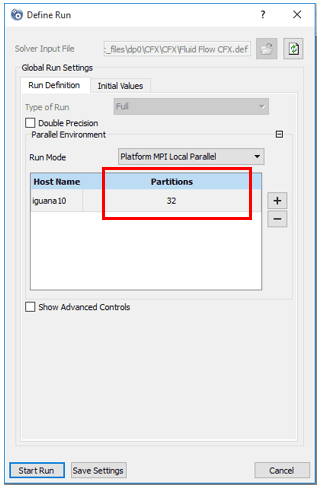
- Once selected in the section below you will see the name of the computer and a column called Partitions
- Simply type the desired number of cores under the Partitions column and then either click “Save Settings” or “Start Run”
ANSYS Electronics Desktop/HFSS/Maxwell
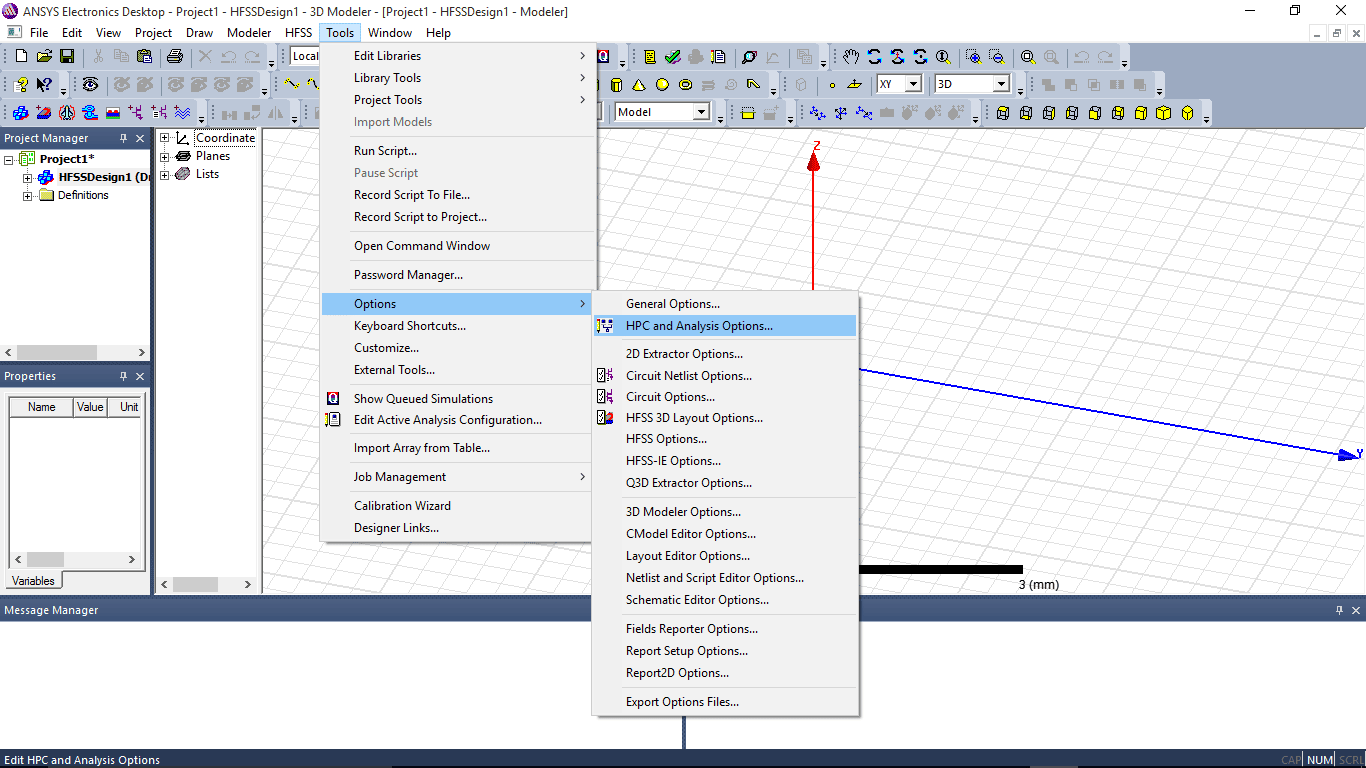
Regardless of which electromagnetic solver you are using: HFSS or Maxwell you can access the ability to change the number of cores by going to the HPC and Analysis Options.
- Go to Tools > Options > HPC and Analysis Options.
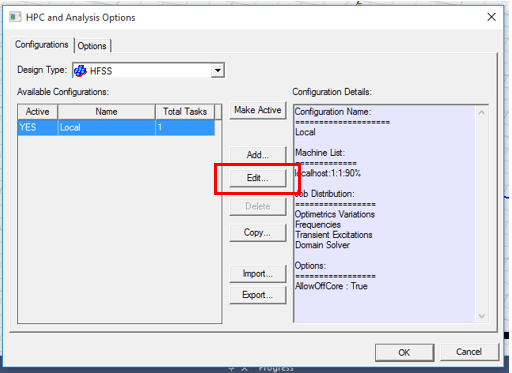
- In the window that pops up you will see a summary of the HPC configuration
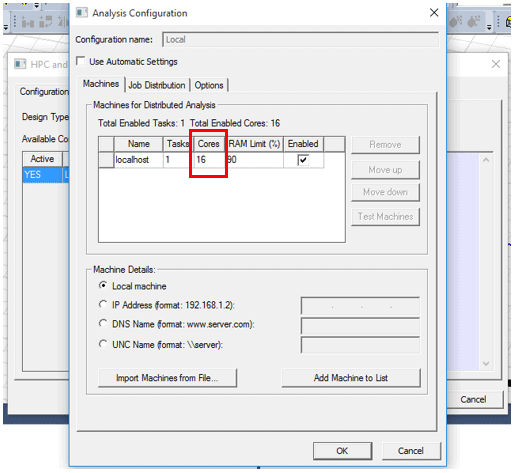
- Click on Edit and you will see a column for Tasks and a column for Cores.
- Tasks relate to job distribution utilizing Optimetrics and DSO licenses
- To simply increase the number of cores you want to run the simulation on, change the cores column to your desired value
- Click OK on all windows
There you have it. That’s how easy it is to turn on Hyperdrive in the flagship ANSYS products to advance your simulations and get to your endpoint faster than before.
If you have any questions or would like to discuss the possibility of upgrading your ship with Hyperdrive (HPC capabilities) please feel free to call us at 1-800-293-PADT or email us at support@padtinc.com.


