Introduction
The Ansys Electronics Desktop environment (referred to hereafter as AEDT) is a familiar place to users of Ansys Maxwell or HFSS, among other tools. And within the AEDT environment, it is easy to set up a parametric analysis, allowing a designer to quickly see results from different design variations. For example, examining how changing the thickness of a conductor or the diameter of a permanent magnet can affect the results of a simulation. Setting up a sweep of a numerical parameters is quick and easy, and a user can also sweep multiple variables at the same time – changing both the magnet diameter and the conductor thickness and seeing which combination yields the best results.
But what if the user wanted to compare different magnet or conductor materials? Materials in AEDT are stored as strings such as “iron” or “NdFe30,” and the sweep setup window doesn’t have a way to change strings. Luckily for us, there is a solution – arrays. Material names can be stored in an array variable and then indexed by an integer variable, which will be the value that we adjust through the parametric sweep!
Basic Setup
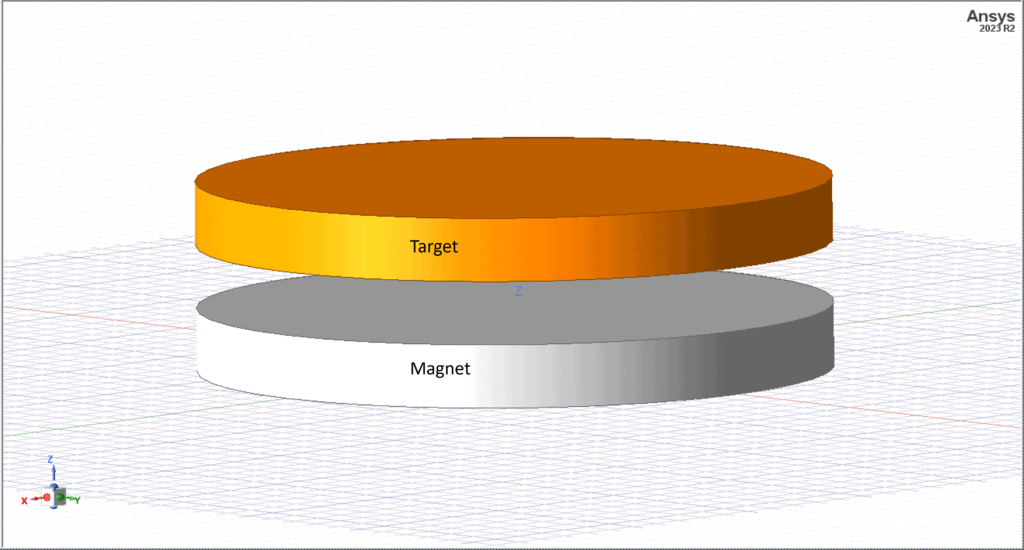
For this example, we are going to use a very basic example of a metal plate and a magnet, 1 mm away from one another. The magnet will be an NdFe30 permanent magnet and the metal plate, or target, will have its material swept between iron, 1010 steel, and copper.
Array Setup
The first thing that needs to be done is to create the list of materials that we want to include in our sweep and set up the array. To set up an array, first we right click on the project name and then click Design Properties. This will open a new window that shows all of the local variables in the project, the properties window. Once we get to the properties window, there’s a handy “Add Array…” button that we will be clicking. We need to define a name for our array (we’ll call it “MaterialArray1”), and then all our values with their indices.
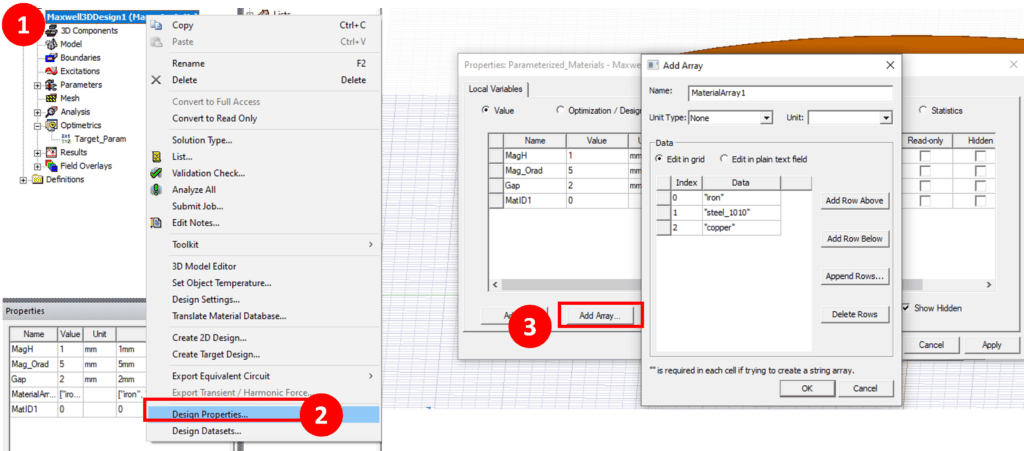
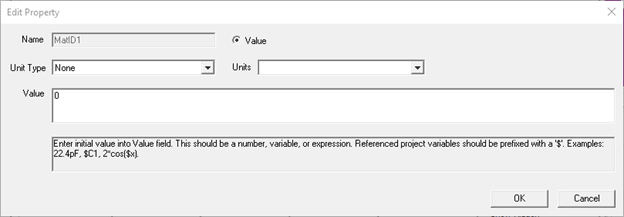
Two important things to note: string arrays require entries to be in double quotes (“”) and entries aren’t case-sensitive. No need worry about leaving caps-lock on, just make sure you spell “IRON” correctly. Now we have our handy material array – but it doesn’t do anything on its own, we must find a way to access the data values. This is where a second variable comes in, which can be added from the properties window as well by clicking the “Add…” button. We’ll name this new variable MatID1.
Indexing Arrays
A unitless value is all that’s needed for the material ID, it just needs to be a number, preferably with a nominal value of zero (0) – arrays in AEDT are zero-indexed, so the first entry in our array corresponds to an ID of 0. Once we have our material array and the ID to select which array value we want, we need to tell our object what it’s made of. Select the object we want to change the material of and go to its properties. In the material section, we need to edit it to delete whatever was there before and tell it that it’s now made of MaterialArray1[MatID1], the array name followed by the index value inside of square brackets. Then if we check the “evaluated value” column of our material, we can see that it corresponds to the first value in our array if MatID1 is equal to 0.
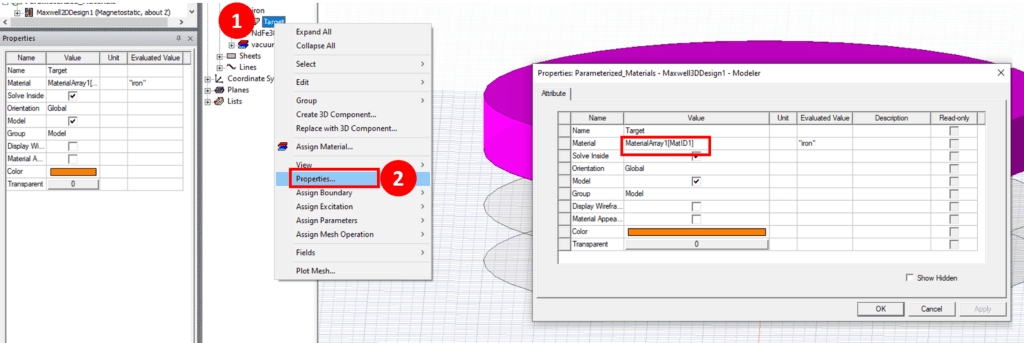
If we change the value of MatID1 to 1, we end up with Steel_1010 as our material – all is working as it should. But we don’t want to have to manually change the value of MatID1 before each of our simulations; that would be time consuming, especially if we have a wider range of materials we want to compare. This is where we utilize the parametric sweep we looked at earlier.
Setting Up a Sweep Analysis
First, right click on the “Optimetrics” category in the project explorer, then navigate to “Add > Parametric…” This will open the “Setup Sweep Analysis” window; we will then click “Add…” and add our sweep. We select MatID1 from the drop down, set the process to a Linear step, and set up out parameter sweep – starting from 0 and ending at 2 in steps of 1.
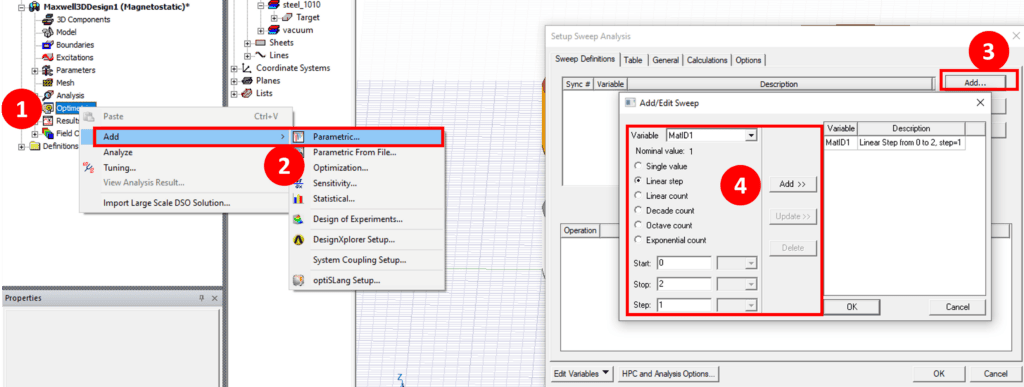
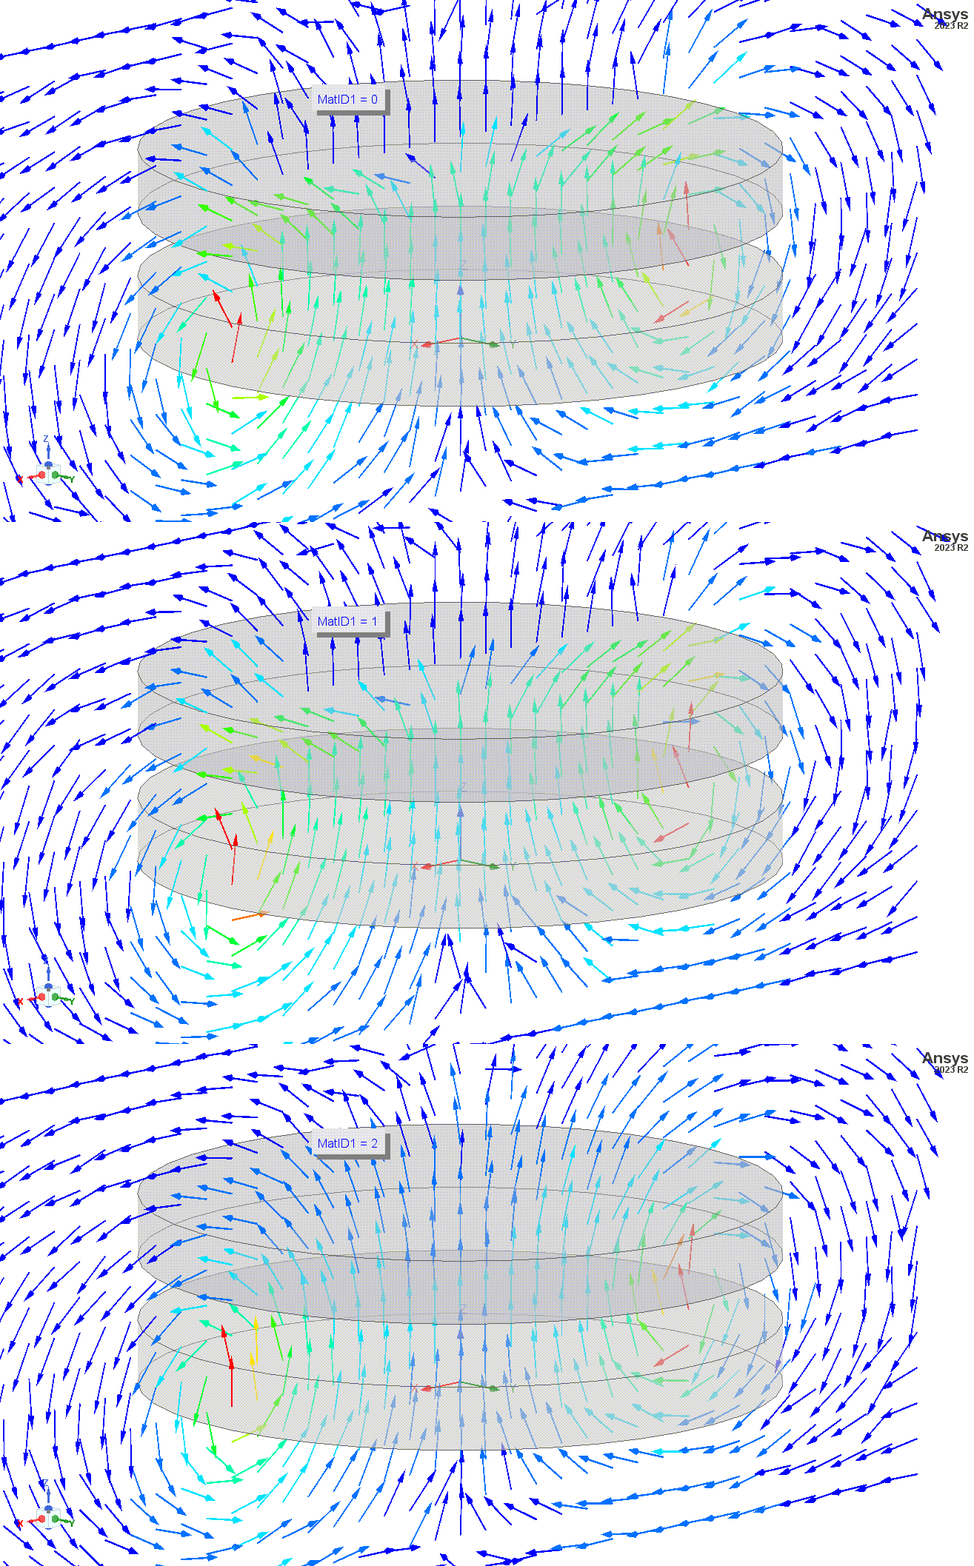
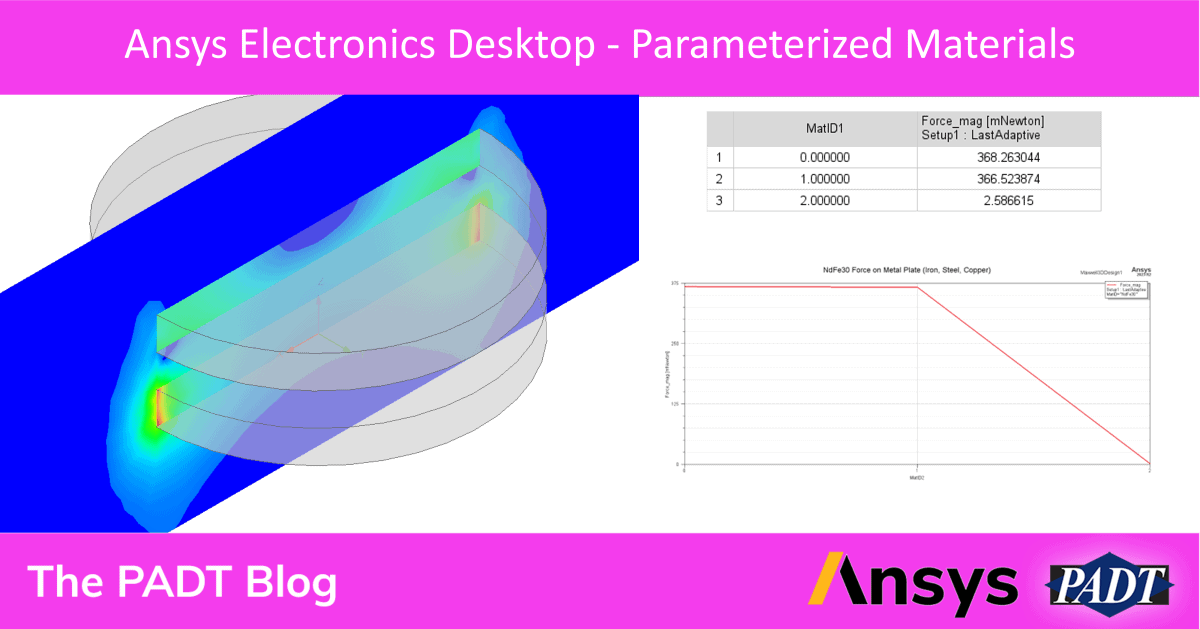
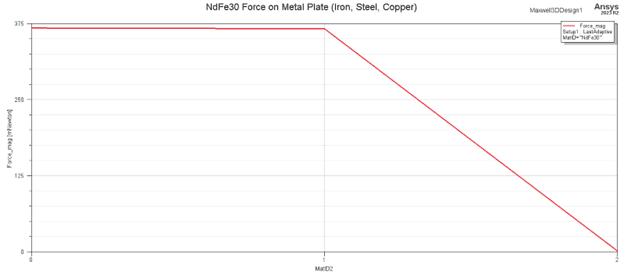
By adding a sweep of our index, MatId1, we now have an object with parameterized materials and a sweep setup that will allow us to run simulations with all the materials in our array, and we don’t have to change the index manually every time. Before we close this window, we want to make sure we head over to the “Options” page and check the box next to “Save Fields and Mesh” – this will allow us to visualize the fields for all of our material variations. After running the simulation, we can investigate the results of the force on the metal plate from our magnet. Remember, our order of materials was Iron, 1010 Steel, and then Copper. As we look at the graph, we see the force from the magnet drop down to 0 when the target is non-magnetic copper – exactly what we expected!
A Few Final Words
Parameterizing materials is a powerful tool for our belts, allowing us to easily investigate and compare the answers to questions such as “What if I made this wire aluminum?” or “How does a Samarium Cobalt magnet compare here?” to name but a few. And with that, I am out of words now.
