It’s not a series of articles until there’s at least 3, so here’s the second article in my series of ‘what not to do’ in ANSYS…
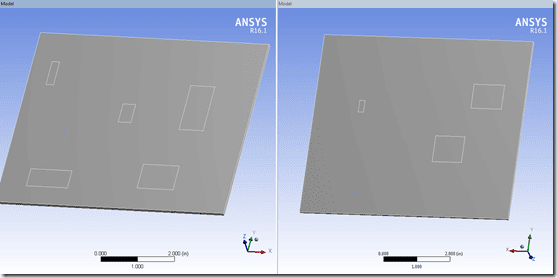
Just in case you’re not familiar with thin sweep meshing, here’s an older article that goes over the basics. Long story short, the thing sweep mesher allows you to use multiple source faces to generate a hex mesh. It does this by essentially ‘destroying’ the backside topology. Here’s a dummy board with imprints on the top and bottom surface:
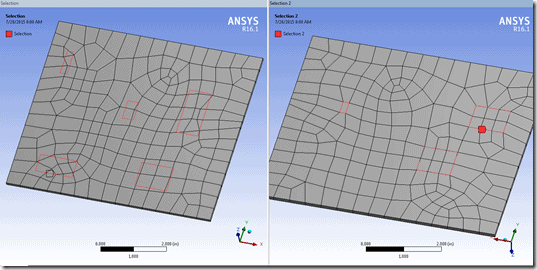
If I use the automatic thin sweep mesher, I let the mesher pick which topology to use as the source mesh, and which topology to ‘destroy’. A picture might make this easier to understand…
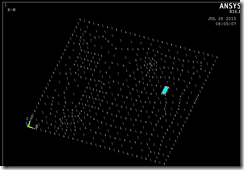
As you can see, the bottom (right picture) topology now lines up with the mesh, but when I look at the top (left picture) the topology does not line up with the mesh. If I want to apply boundary conditions to the top of the board (left picture), I will get some very odd behavior:
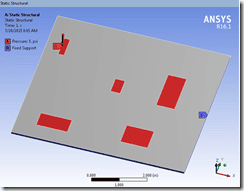
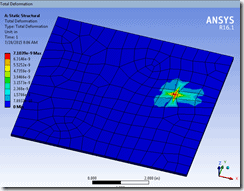
I’ve fixed three sides of the board (why 3? because I meant to do 4 but missed one and was too lazy to go back and re-run the analysis to explain for some of future deflection plots…sorry, that’s what you get in a free publication) and then applied a pressure to all of those faces. When I look at the results:
Only one spot on the surface has been loaded. If you go back to the mesh-with-lines picture, you’ll see that there is only a single element face fully contained in the outline of the red lines. That is the face that gets loaded. Looking at the input deck, we can see that the only surface effect element (how pressure loads are applied to the underlying solid) is on the one fully-contained element face:
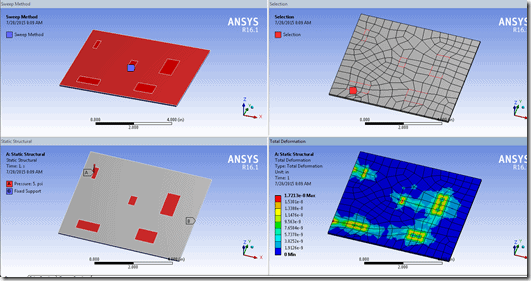
If I go back and change my thin sweep to use the top surface topology, things make sense:
The top left image shows the thin sweep source definition. Top right shows the new mesh where the top topology is kept. Bottom left shows the same boundary conditions. Bottom right shows the deformation contour.
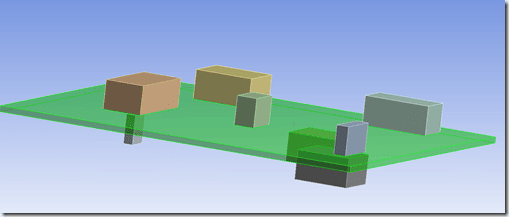
The same problem occurs if you have contact between the top and bottom of a thin-meshed part. I’ll switch the model above to a modal analysis and include parts on the top and bottom, with contact regions already imprinted.
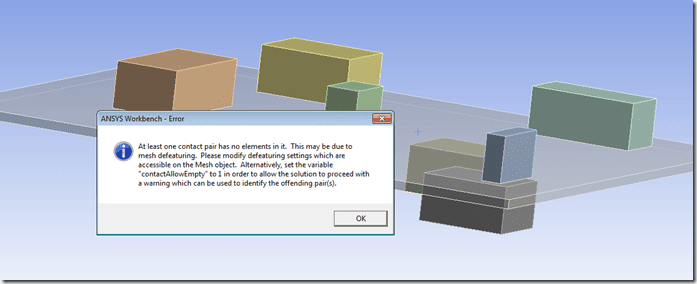
I’ll leave the thin sweeping meshing control in place and fix three sides of the board (see previous laziness disclosure). I hit solve and nothing happens:
Ah, the dreaded empty contact message. I’ll set the variable to run just to see what’s going on. Pro Tip: If you don’t want to use that variable then you would have to write out the input deck, it will stop writing once it gets to the empty contact set. Then go back and correlate the contact pair ID with the naming convection in the Connections branch.
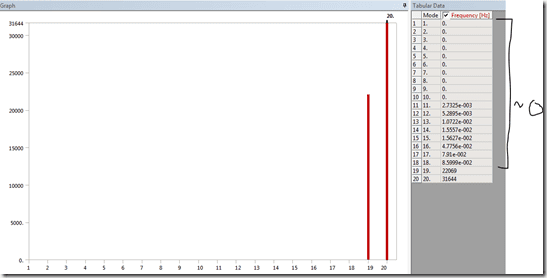
The model solves and I get a bunch of 0-Hz (or near-0) modes, indicating rigid body motion:
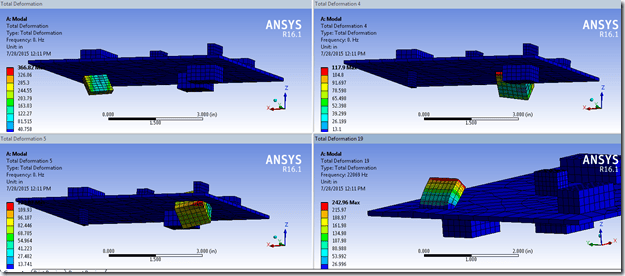
Looking at some of those modes, I can see that the components on one side of my board are not connected:
The missing contacts are on the bottom of the board, where there are three surface mounted components (makes sense…I get 18 rigid body modes, or 6 modes per body). The first ‘correct’ mode is in the bottom right image above, where it’s a flapping motion of a top-mounted component.
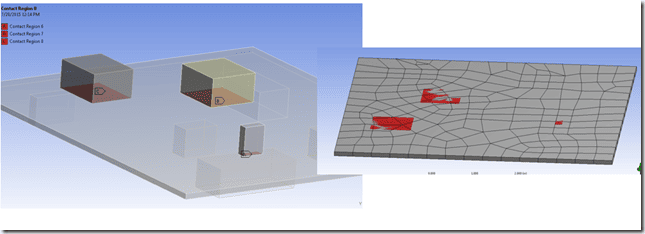
So…why don’t we get any contact defined on the bottom surface? It’s because of the thin meshing. The faces that were used to define the contact pair were ‘destroyed’ by the meshing:
Great…so what’s the take-away from this? Thin sweep meshing is great, but if you need to apply loads, constraints, define contact…basically interact with ANYTHING on both sides of the part, you may want to use a different meshing technique. You’ve got several different options…
- Use the tet mesher. Hey, 2001 called and wants its model size limits back. The HPC capabilities of ANSYS make it pretty painless to create larger models and use additional cores and GPUs (if you have a solve-capable GPU). I used to be worried if my model size was above 200k nodes when I first started using ANSYS…now I don’t flinch until it’s over 1.5M
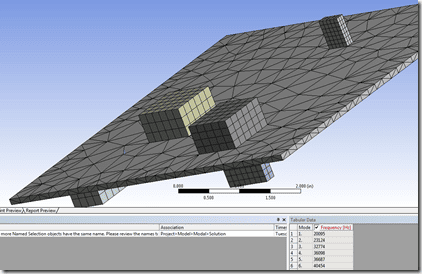
Look ma, no 0-Hz modes! - Use the multi-zone mesher. With each release the mutli-zone mesher has gotten better, but for most practical applications you need to manually specify the source faces and possibly define a smaller mesh size in order to handle all the surface blocking features.
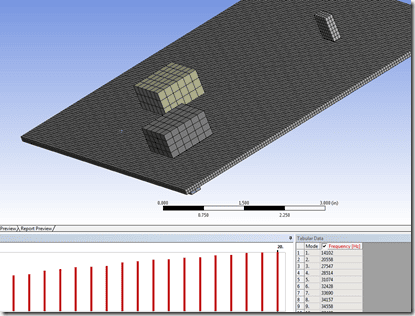
Look pa, no 0-Hz modes!Full disclosure…the multi-zone mesher did an adequate job but didn’t exactly capture all of the details of my contact patches. It did well enough with a body sizing and manual source definition in order to ‘mostly’ bond each component to the board. - Use the hex-dominant mesher. Wow, that was hard for me to say. I’m a bit of a meshing snob, and the hex dominant mesher was immature when it was released way back when. There were a few instances when it was good, but for the most part, it typically created a good surface mesh and a nightmare volume mesh. People have been telling me to give it another shot, and for the most part…they’re right. It’s much, much better. However, for this model, it has a hard time because of the aspect ratio. I get the following message when I apply a hex dominant control:
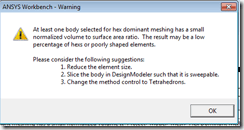
- The warning is right…the mesh looks decent on the surface but upon further investigation I get some skewed tets/pyramids. If I reduce the element size I can significantly reduce the amount of poorly formed elements:
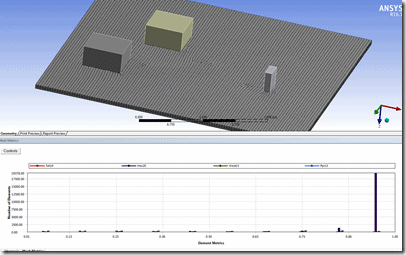
- That’s going on the refrigerator door tonight!
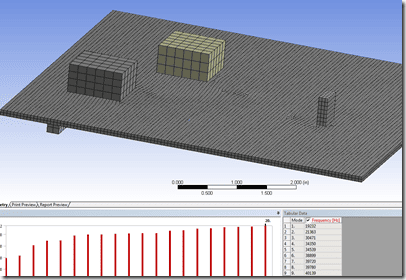
And…no 0-Hz modes!
- Lastly…go back to DesignModeler or SpaceClaim and slice/dice the model and use a multi-body part.
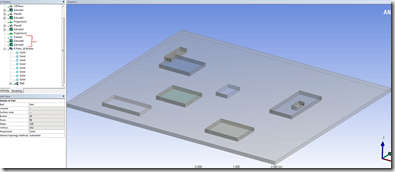
3 operations, ~2 minutes of work (I was eating at the same time)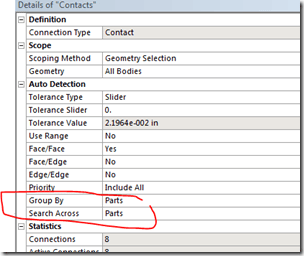
Modify the connection group to search/sort across partsThat’s a purdy mesh! (Note: most of the lower-quality elements, .5 and under, are because there are 2-elements through thickness, reducing the element size or using a single element thru-thickness would fix that right up)
Phew…this was a long one. Sorry about that. Get me talking about meshing and look what happens. Again, the take-away from all of this should be that the thin sweeper is a great tool. Just be aware of its limitations and you’ll be able to avoid some of these ‘odd’ behaviors (it’s not all that odd when you understand what happens behind the scenes).

