Introduction
Hello everyone, if this this the first “World Domination With SCADE” post you’re looking at, it might be valuable to go back and check out Part 1. Today we’ll be going over SCADE’s automatic code generation and implementing it into an Arduino project. If you recall where we left off, we developed a simple model, which allows an output array to be controlled based on an input array. We’ll go ahead and spend some time going over the steps to generate C code for use in embedded systems, develop an Arduino project, then test the Arduino code on physical hardware.
Initial Arduino Setup
First, we must create a new sketch in Arduino IDE. Navigate to File>Save As> and name your sketch folder, in the directory of our choice. In this case, we can name the directory Arduino-SCADE for clarity.
You should see a (nearly) blank project which looks something like this.
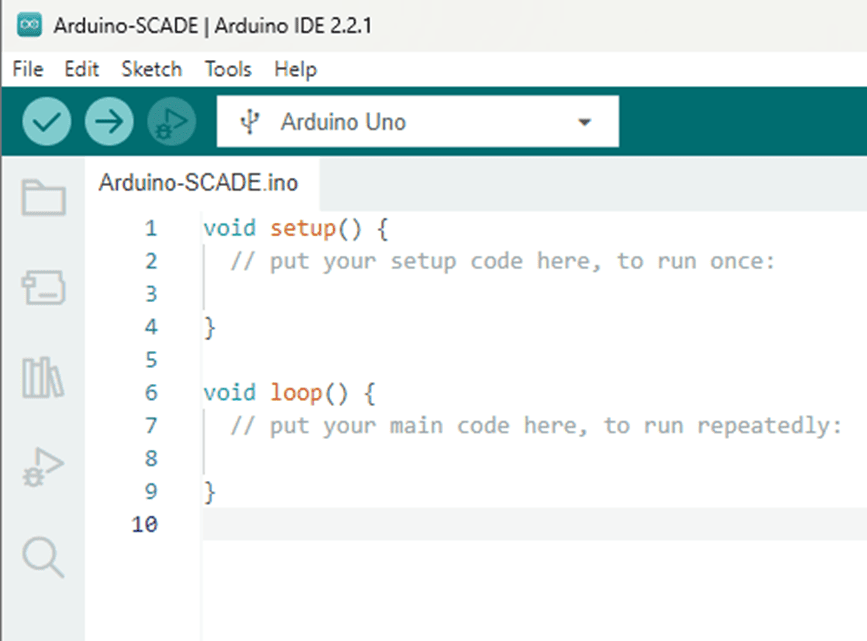
Creating this project first allows us to choose the folder created as our target directory for SCADE-generated code. This provides an easy way to make changes in SCADE and see how they play out on the Arduino, without having to copy and paste files multiple times.
SCADE Code Generation
Once you’re happy with the SCADE project, you can simply export the C code to a separate directory for use in the IDE of your choice. The C code SCADE generates is target agnostic, meaning it can be used on any hardware which can interpret C. In this case, we’ll use Arduino IDE for its ease of use and cost-effectiveness.
Here are the steps one must take to generate C code in SCADE.
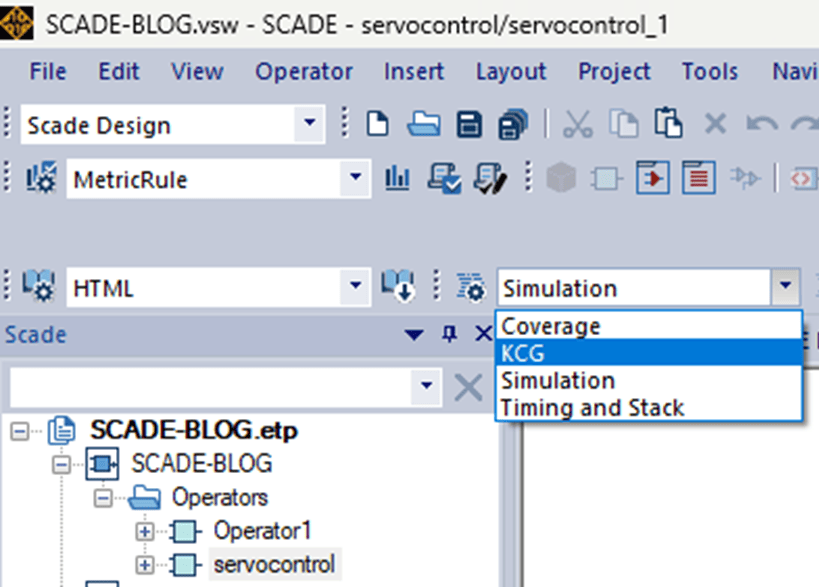
First, select your top-level operator (the operator which contains all others). In this case, it will be servocontrol. Then, in the ribbon bar, select the KCG option from the drop-down menu.
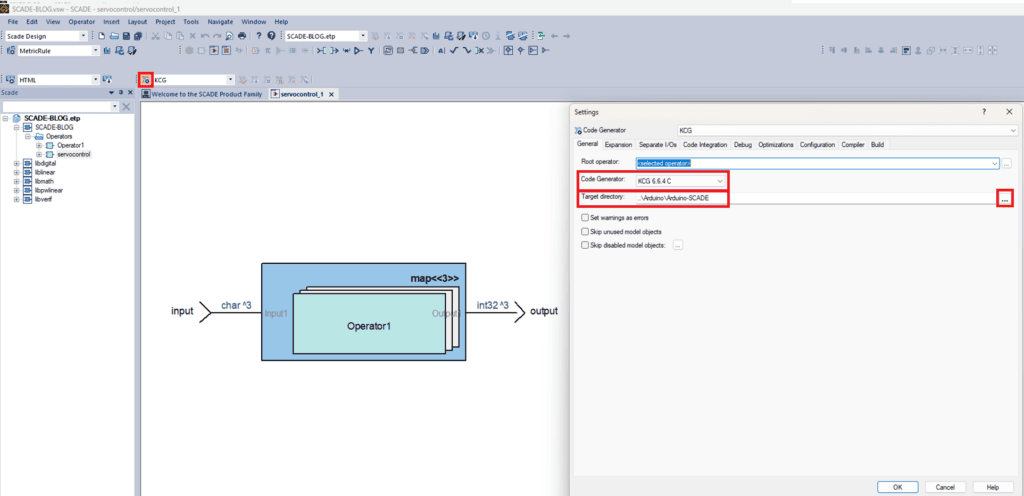
From there, select settings, and change the code generator version to KCG 6.6.4 C and your target directory to the Arduino project folder.
Once again, select the top-level operator, then select generate!

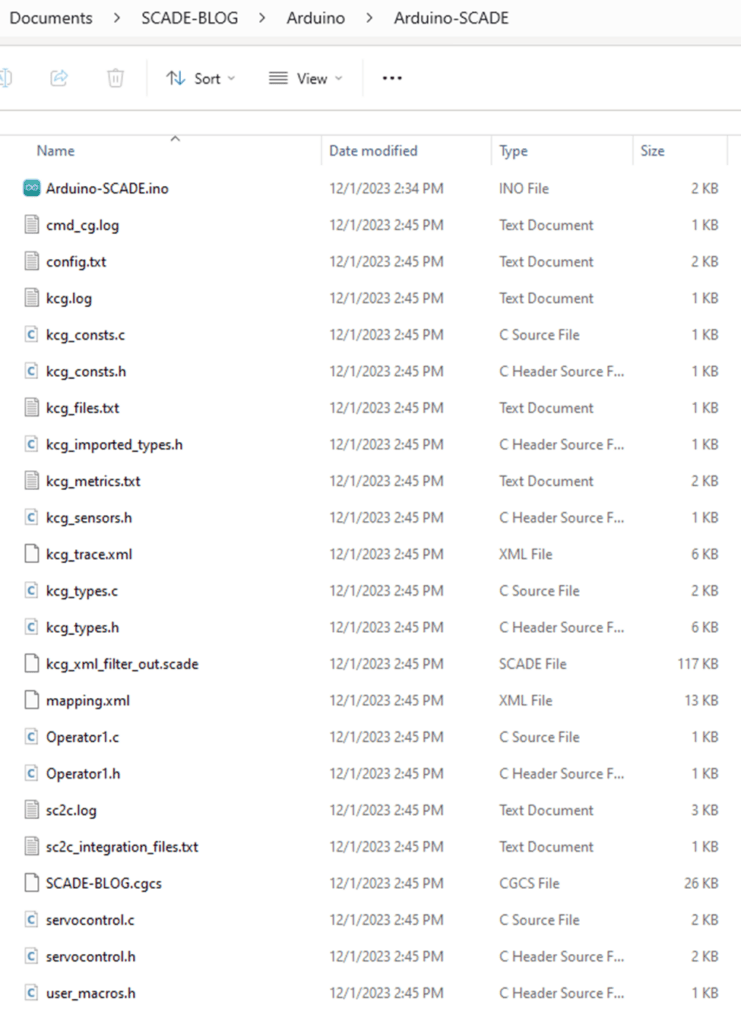
Congrats, we did it! We successfully generated C code using SCADE. To confirm, open file explorer and navigate to your target directory. Your generated files should look something like this.
Arduino Code
If the steps are followed correctly, the Arduino IDE should look like this when done.

Notice the different .h and .c files at the top of the Arduino IDE.
To test the code on physical hardware, only a minor amount of work and handwritten code must be added in Arduino IDE to make the servos function as intended.
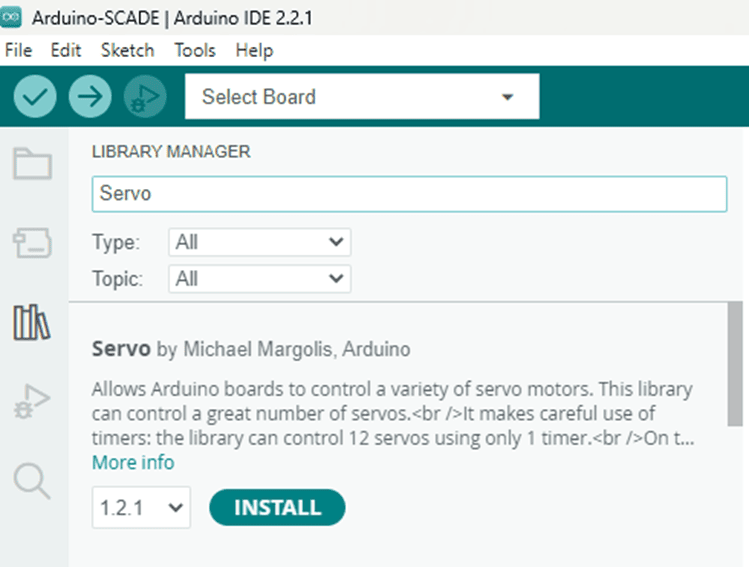
Depending on your existing libraries at hand, you may also need to import the “Servo” library to control the servos using the Arduino itself. Navigate to the library manager, and search for “Servo”. Go ahead and install, if you haven’t already.
From there, we should map the Arduino functionality to the generated code like so:
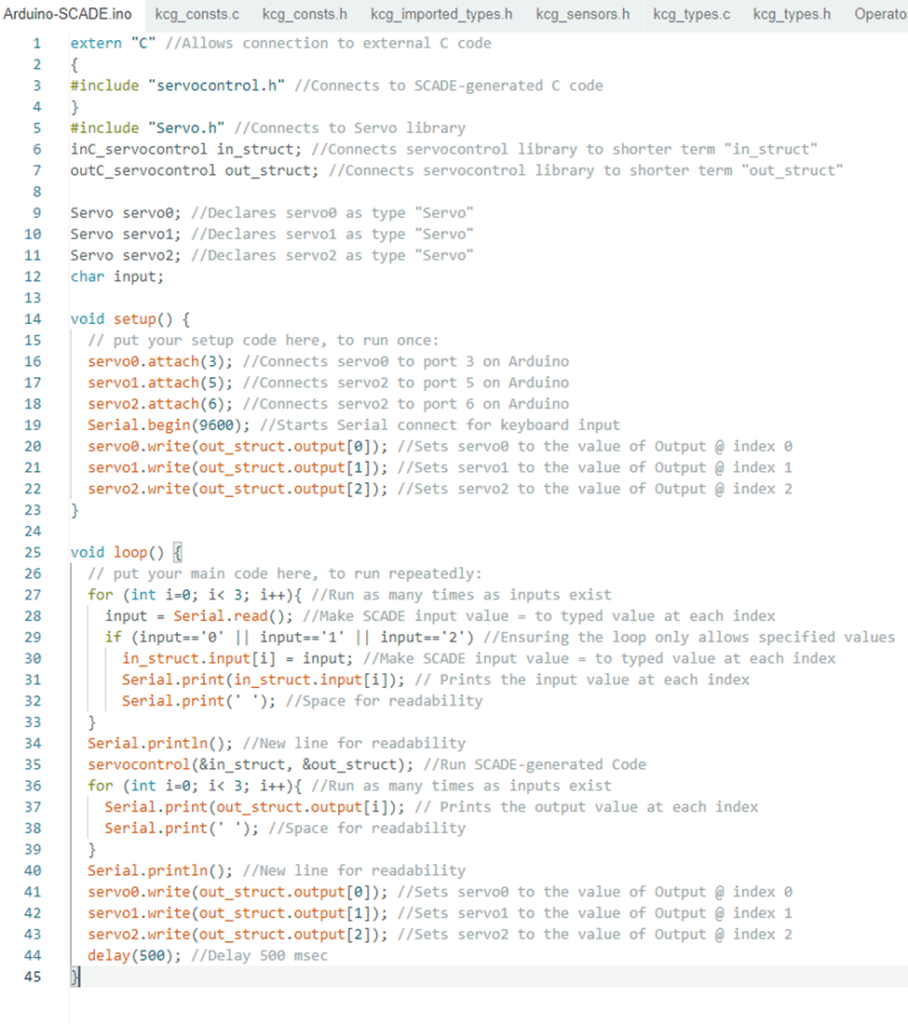
Note that the servos are mapped to the available PWM pins on the Arduino. The general idea of this code is to set up all connections between the for the Arduino and its hardware, then use Serial communication between a computer and the Arduino for controlling the servos themselves. Once the setup is complete, we can type a string of characters (e.g. 012) and see a serial output (e.g. 0 127 255) in the monitor along with the servos actually running.
Hardware Setup
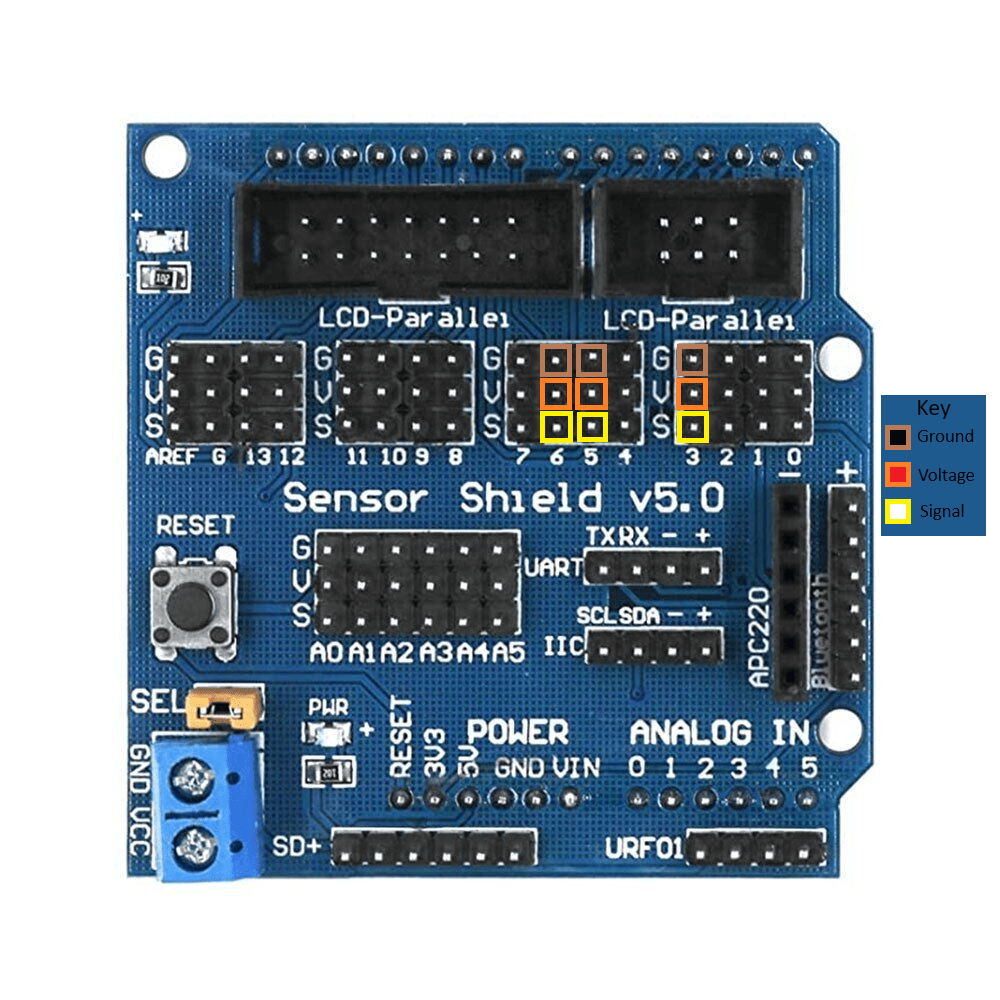
From here, one must connect servos and a USB cable to the Arduino to confirm functionality. We’re using an Arduino Sensor Shield V5.0 to simplify wiring. Depending on your setup, your workflow may look a little different.
Hardware Testing
If everything went according to plan, you should be able to run this code to your heart’s desire. We’ve included a video of the code running on the Arduino to show off this functionality.
We’ve also included a link to our GitHub Repository for this project, which includes the SCADE and Arduino projects. It will be updated as the series continues, so stay tuned for more blog posts like this regarding the SCADE tool. There will certainly be more in there near future! If you have questions about SCADE, or any other ANSYS products please get in contact with us. We’d love to hear from you.
This is Noah, signing out. Have a great day.

